

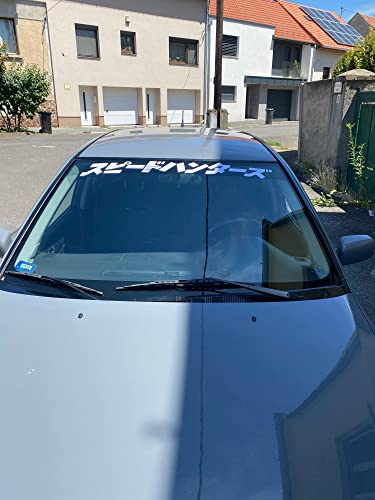
It can work especially well with:
- Japanese performance cars
- Drift-inspired builds
- Track-style street cars
- Show vehicles
- Modified coupes and sedans
- White wheels or exterior accents
- Black, red, blue or gray paint
- Other monochrome decals
JDM styling covers everything from carefully restored classics to widebody show cars that appear to have declared war on subtlety. Our coverage of Royal Fitment’s JDM, KDM and modified-car classes shows how exterior graphics can support a cohesive build when they match the car’s overall theme.
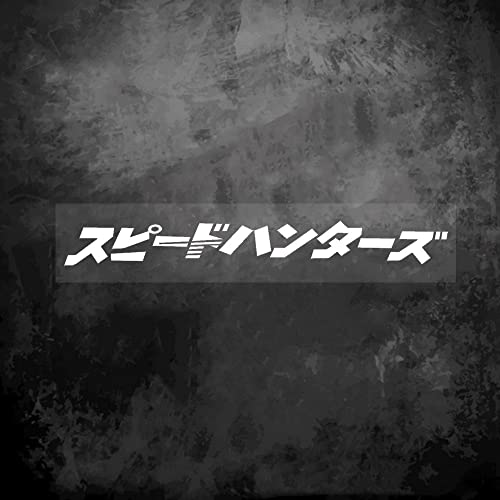
Die-Cut Design With No Background
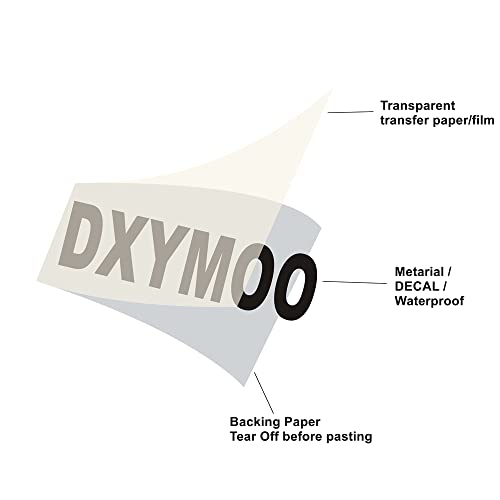
This decal uses a die-cut format rather than a large printed rectangle. After installation and removal of the transfer layer, only the intended lettering and design should remain on the surface.
Benefits of a die-cut decal include:
- Cleaner factory-style presentation
- No visible clear rectangular border
- Paint or glass visible between letters
- Strong contrast on darker surfaces
- Easier coordination with other exterior graphics
- Less visual bulk than a solid printed banner
The white finish should stand out most clearly against tinted glass and dark paint. Contrast may be lower on white, silver or very light-colored vehicles.
Universal Size Requires Measuring
The decal measures approximately:
- Width: 100 cm or 39.37 inches
- Height: 12 cm or 4.72 inches
Measure the intended installation area before ordering. Windshield widths, rooflines, mirror positions and glass curvature vary considerably between vehicles.
A 39-inch decal may fit differently on:
- Compact coupes
- Full-size sedans
- Pickup trucks
- SUVs
- Hatchbacks
- Vehicles with steeply curved windshields
- Cars equipped with camera or sensor housings
Do not assume that “universal” means perfectly centered on every windshield. Universal means you get to perform the measuring. The decal, displaying admirable confidence, will not do it for you.
Check Windshield Visibility and Local Laws First
A windshield banner must not interfere with the driver’s clear view, traffic signals, pedestrians or other vehicles. Laws governing windshield decals vary by state and location, so verify the applicable rules before installation.
California is particularly restrictive. The California DMV warns drivers not to place signs or objects on the windshield when they block the driver’s view and lists only limited permitted mounting areas for certain items. A 39-inch banner may not qualify for those exceptions simply because it is positioned near the top edge. California DMV
Before installing the decal:
- Check state and local windshield-obstruction rules
- Verify the top of the decal remains outside the driver’s sightline
- Check visibility of overhead traffic signals
- Avoid covering factory tint markings
- Keep driver-assistance cameras unobstructed
- Do not cover rain or light sensors
- Avoid obstructing registration or inspection stickers
- Confirm that windshield wipers do not damage the design
Our guide to keeping common vehicle modifications legal explains why appearance modifications still need to comply with equipment and visibility rules.
When in doubt, install the decal on a rear window, bumper, spoiler, display panel or another legal surface instead of the windshield.
Compatibility With Modern Driver-Assistance Systems
Many newer vehicles contain cameras and sensors near the rearview mirror. These components may support:
- Automatic emergency braking
- Lane-departure warning
- Lane-centering assistance
- Traffic-sign recognition
- Automatic high beams
- Rain-sensing wipers
- Forward-collision warnings
Do not place any portion of the decal over the camera’s viewing area or the dotted ceramic region surrounding its housing.
A windshield decal that interferes with a safety camera can cause warnings, disable features or reduce system performance. Being extremely committed to the JDM aesthetic is not an approved calibration procedure.
Seller-Stated Weather Resistance
The product description identifies the decal as waterproof, sun-resistant, non-fading and suitable for long-term exterior use.
Actual service life will depend on:
- Surface preparation
- Installation quality
- Climate
- UV exposure
- Vehicle storage
- Car-wash chemicals
- Pressure washing
- Ice scraping
- Windshield-wiper contact
- Condition of the adhesive
Avoid presenting a guaranteed lifespan unless the manufacturer provides a specific warranty or durability rating.
Suitable Installation Surfaces
The decal may be applied to a clean, smooth surface such as:
- Automotive glass
- Painted metal
- Smooth plastic bumper panels
- Spoilers
- Toolboxes
- Display boards
- Garage windows
- Show-car panels
Avoid installing it over:
- Ceramic coatings without testing adhesion
- Waxed surfaces
- Textured plastic
- Rubber seals
- Peeling clear coat
- Loose vinyl wrap
- Rust
- Cracked paint
- Windshield chips or cracks
- Heating elements that may be damaged during removal
Test a small, inconspicuous area when surface compatibility is uncertain.
How to Install the Windshield Decal
A decal this wide is easier to install with two people. One person can hold the opposite side while the other controls alignment and pressure.
Supplies You May Need
- Car-wash soap
- Clean microfiber towels
- Glass cleaner without wax or silicone
- Isopropyl-alcohol surface cleaner
- Painter’s tape
- Measuring tape
- Plastic decal squeegee
- Removable marker
- Masking tape
- Pin or fine needle for isolated bubbles
Avoid using a metal scraper directly against glass, paint or the decal.
Step 1: Choose the Installation Location
Decide whether the decal will be installed on the windshield, rear window, bumper or another compatible surface.
If using the windshield, sit in the normal driving position and verify that the complete design will remain outside your clear view.
Step 2: Measure the Surface
Measure the width of the glass and mark its center. Then mark the center of the decal’s transfer layer.
Aligning those two points will keep the design balanced from side to side.
Also measure the height from the roof edge or top of the windshield at several points. Windshields curve, and using only one measurement can leave the finished decal visibly crooked.
Step 3: Clean the Surface
Wash away dirt and residue. Then clean the area with a product that does not leave wax, silicone or protective film.
Allow the surface to dry completely.
Do not install the decal over:
- Dust
- Glass treatment
- Rain repellent
- Wax
- Grease
- Interior overspray
- Moisture
Contamination can prevent individual letters from adhering securely.
Step 4: Position the Decal
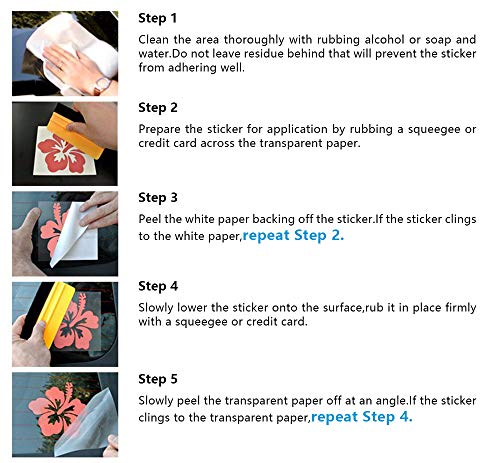
Place the decal against the surface with its backing still attached. Use painter’s tape to hold it in position.
Step back and inspect the alignment from the front of the vehicle. Confirm that it follows the glass or body line evenly.
Do not judge alignment solely from inside the cabin. Windshield curvature can make a straight decal look crooked from one angle and correct from another.
Step 5: Create a Center Hinge
Apply a vertical strip of painter’s tape through the center of the decal. This creates two manageable sections and reduces the chance of the full 39-inch design folding onto itself.
Step 6: Apply the First Half
Fold one side back toward the center and carefully remove the backing paper, leaving the lettering attached to the transfer layer.
Cut or fold away the exposed backing without cutting the decal.
Lower the transfer layer gradually while using a plastic squeegee to press the design onto the surface from the center outward.
Step 7: Apply the Second Half
Remove the center hinge and repeat the process on the opposite side.
Use overlapping squeegee strokes to push air toward the outside edges.
Step 8: Press Every Letter
Go over the complete design with firm, even pressure. Pay particular attention to:
- Thin lettering
- Sharp corners
- Small design elements
- Edges near curved glass
- Areas close to seals or trim
Step 9: Remove the Transfer Layer
Peel the transfer layer back slowly at a low angle instead of pulling it directly away from the surface.
If any letter lifts, lower the transfer layer, press the area again and wait before continuing.
Step 10: Inspect the Finished Decal
Check for loose edges, wrinkles and trapped air.
Small bubbles may settle after installation. A stubborn isolated bubble can sometimes be released carefully with a fine pin, but avoid puncturing multiple areas unnecessarily.
Installation Temperature and Curing
Install the decal in a clean, dry area within the adhesive manufacturer’s recommended temperature range.
Avoid installation when:
- The glass is extremely cold
- The panel is hot from direct sunlight
- Rain is expected immediately
- The surface contains condensation
- Wind can blow dust beneath the decal
After installation, avoid washing the vehicle or directing high-pressure water at the decal until the adhesive has bonded according to the manufacturer’s instructions.
Common Installation Mistakes
Skipping the Measurement
A decal almost 40 inches wide makes a crooked installation extremely visible.
Installing Over Windshield Treatment
Rain repellents and glass coatings may prevent the adhesive from bonding properly.
Pulling the Backing Off All at Once
Exposing the entire adhesive surface makes the decal harder to control and increases the risk of wrinkles.
Stretching the Decal
Pulling the transfer layer can distort the lettering and spacing.
Covering Sensors
Modern windshield cameras need a clear field of view. Keep the complete sensor area unobstructed.
Ignoring Local Laws
A clean installation can still earn unwanted attention if it obstructs the windshield. Measure twice, check the vehicle code once, and avoid collecting fix-it tickets as build accessories.
Decal Care and Maintenance
To preserve the appearance:
- Hand-wash around the design when possible
- Use mild automotive soap
- Avoid abrasive compounds
- Do not scrape the decal with a razor
- Keep pressure-washer nozzles away from the edges
- Remove bird droppings and contaminants promptly
- Avoid aggressive ice scrapers
- Inspect thin lettering for lifting
Automatic car-wash brushes can catch small edges and shorten decal life.
Removing the Decal
Warm the decal gently with a hair dryer or safe heat source. Peel the lettering slowly at a low angle.
Remove remaining adhesive with a product approved for the underlying glass or paint.
Do not use excessive heat around laminated glass, window tint, plastic trim or painted surfaces.
If the decal is installed on interior window tint, removal may damage the film. Exterior glass installation is generally safer for this style of banner, subject to local laws and product instructions.
Frequently Asked Questions
What size is the decal?
The decal measures approximately 100 × 12 centimeters, or 39.37 × 4.72 inches.
What color is it?
This version is white.
How many decals are included?
The package contains one decal.
Does the decal have a background?
No. It is described as a die-cut decal, so only the lettering and intended design remain after the transfer layer is removed.
Is it waterproof?
The seller describes it as waterproof and sun-resistant. Durability depends on preparation, installation and environmental exposure.
Is this an officially licensed Speedhunters product?
Official licensing has not been confirmed. Do not represent it as official merchandise unless licensing documentation is available.
Will it fit every windshield?
No. Measure the windshield before purchasing. Vehicle width, glass curvature, cameras and legal visibility requirements can affect fitment.
Can it be installed on a bumper?
Yes, provided the bumper has a clean, smooth surface with enough space for the 39.37-inch design.
Can I install it over window tint?
Do not install it directly over interior tint unless the film manufacturer approves it. Removal could damage the tint.
Is a windshield banner legal?
The answer depends on the jurisdiction, placement and amount of glass obstructed. Check current state and local laws before installation.
Final Thoughts
This white 1000 × 120mm JDM Speedhunters-style decal offers a bold, die-cut windshield-banner appearance without a visible printed background. Its nearly 40-inch width makes it suitable for tuner cars, show builds and other vehicles with enough legal mounting space.
Measure carefully, keep cameras and the driver’s view unobstructed, and use the center-hinge installation method to keep the lettering straight. A windshield banner should make the build look finished—not make every traffic light a guessing game.



There are no reviews yet.