


What Is a 2.5-Inch Exhaust Pipe Kit Used For?
A universal exhaust tubing kit gives builders material to fabricate an exhaust system instead of relying on a vehicle-specific bolt-on assembly.
Common projects include:
- Replacing damaged exhaust pipe
- Fabricating a new mid-pipe
- Installing aftermarket mufflers
- Adding resonators
- Building a cat-back system
- Adding an exhaust cutout
- Routing exhaust around suspension or drivetrain components
For custom builds, tubing can be cut and positioned to create the exhaust path the vehicle actually requires.
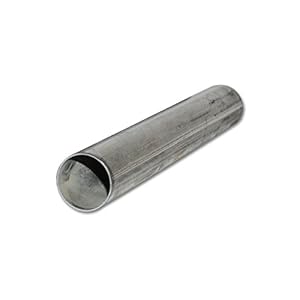
2.5-Inch Exhaust Tubing
The important specification is:
2.5-inch tube diameter
SPELAB identifies its 2.5-inch exhaust components as approximately:
63.5mm
When matching exhaust components, determine whether the listed measurement refers to:
- Outside diameter
- Inside diameter
- Slip-fit connection size
SPELAB’s current cutout documentation specifically warns customers that its stated exhaust sizing refers to the outside diameter, so measure the existing exhaust before ordering compatible fabrication parts.
That small measurement detail is the difference between exhaust fabrication and staring at two pieces of pipe that refuse to become friends.
Is 2.5-Inch Exhaust Pipe Good for Performance Cars?
A 2.5-inch exhaust is a very common size for street-performance vehicles.
It can work well on many:
- Naturally aspirated four-cylinder engines
- Turbocharged four-cylinder engines
- Six-cylinder performance cars
- Moderate-output V8 applications
- Dual-exhaust V8 systems
But exhaust diameter should be selected according to the engine’s airflow requirements.
Bigger is not automatically better.
Excessively large tubing can make packaging more difficult and may change:
- Exhaust velocity
- Sound
- Resonance
- Ground clearance
The correct diameter depends on the complete combination.
2.5-Inch Single Exhaust vs. Dual 2.5-Inch Exhaust
There is a major difference between:
one 2.5-inch pipe
and:
two 2.5-inch pipes
A dual 2.5-inch exhaust has substantially more total cross-sectional flow area than a single 2.5-inch system.
That’s why 2.5-inch tubing is extremely common on V8 dual-exhaust systems.
A typical configuration might look like:
Left Header → 2.5″ Pipe
Right Header → 2.5″ Pipe
then through an:
X-pipe or H-pipe
before continuing to the mufflers.
Our X Pipe vs H Pipe: Which Sounds Better? guide explains how those two layouts affect exhaust behavior and sound.
Stainless-Steel Construction
The SPELAB kit is advertised as using:
stainless steel
Stainless exhaust tubing is desirable because an exhaust system constantly encounters:
- Condensation
- Road water
- Salt
- Heat cycles
- Exhaust gases
- Road debris
Compared with basic mild-steel exhaust tubing, stainless steel generally offers improved corrosion resistance.
That can be particularly valuable on a system intended to remain on the vehicle for years.
Confirm the Stainless Grade
SPELAB’s current electronic exhaust-cutout products specifically identify their main exhaust piping as:
304 stainless steel
However, if the separate tubing kit listing you’re purchasing only states “stainless steel,” do not automatically advertise it as 304 stainless unless the seller or manufacturer confirms that specification for that exact kit.
For the product page, the safe description is simply:
stainless-steel exhaust tubing
unless the exact material grade is documented.
Great for Custom Exhaust Cutout Installations
A 2.5-inch tubing kit can be particularly useful when adding an electronic exhaust cutout to a custom exhaust system.
A cutout installation may require fabrication around:
- Y-pipe
- Cutout valve
- Dump tube
- Existing mid-pipe
- Mufflers
- Crossmember
- Driveshaft
Our complete How to Install Exhaust Cutout the Right Way guide explains where a cutout should be installed and what to avoid.
SPELAB also currently sells 2.5-inch electronic cutout systems intended for compatible 2.5-inch exhaust piping.
For manufacturer information, see SPELAB Automotive Parts.
Perfect Companion for a Universal Exhaust Cutout
When installing a universal cutout, you may need additional straight or bent exhaust tubing to position the valve correctly.
Fabrication tubing lets the installer:
- Determine the ideal cutout location.
- Remove the appropriate section of existing exhaust.
- Position the branch or Y-section.
- Route the dump outlet safely.
- Maintain adequate ground clearance.
- Weld or clamp the assembly in place.
Correct placement matters more than simply finding an empty spot under the car.
Don’t Mount Exhaust Components Too Low
Ground clearance should be checked before final welding.
This is especially important on:
- Lowered cars
- Performance suspension setups
- Vehicles with long wheelbases
- Cars with large exhaust tubing
The exhaust should not become the lowest point underneath the vehicle.
A beautifully welded stainless exhaust dragging across every speed bump is technically still custom fabrication.
Just not the good kind.
Can You Build a Cat-Back Exhaust With Universal Tubing?
Yes, assuming the kit contains enough material and appropriate bends for the vehicle.
A custom cat-back can include:
Catalytic Converter Outlet
↓
Mid-Pipe
↓
Resonator
↓
Muffler
↓
Tailpipe
Universal tubing provides the raw material, but the fabricator still needs to determine:
- Pipe routing
- Muffler position
- Hanger locations
- Flange connections
- Tip placement
Our Catback Exhaust vs Axleback: Which Wins? guide explains the difference between these exhaust configurations.
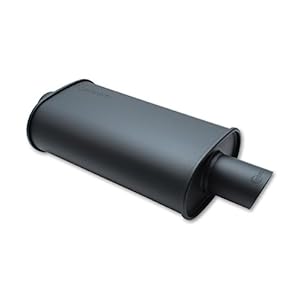
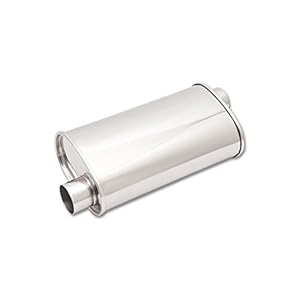
Muffler Installation
Universal 2.5-inch pipe can also help install a performance muffler.
Before ordering a muffler, verify its:
- Inlet diameter
- Outlet diameter
- Inlet location
- Outlet location
- Case length
- Overall length
A 2.5-inch exhaust pipe generally works most cleanly with a compatible 2.5-inch muffler inlet or outlet.
Reducers and expanders can connect different sizes, but minimizing unnecessary transitions usually makes fabrication easier.
Resonator Installation
Resonators are frequently added to control:
- Drone
- Rasp
- Harsh frequencies
- Excessive cabin noise
A universal pipe kit allows the installer to create room for a resonator in the mid-pipe.
That’s particularly useful on modified vehicles where removing factory exhaust components has made the car much louder than expected.
Performance exhaust modification has a long history of creating the sentence:
“It sounded better on YouTube.”
Does 2.5-Inch Exhaust Tubing Add Horsepower?
Not by itself.
Tubing diameter is only one part of the exhaust system.
Power gains depend on:
- Engine airflow
- Exhaust manifold or headers
- Catalytic converters
- Pipe diameter
- Muffler restriction
- Turbocharger configuration
- Engine calibration
Replacing a restrictive factory exhaust with a properly designed freer-flowing system may improve high-load airflow.
But installing 2.5-inch tubing does not guarantee a specific horsepower increase.
Exhaust Backpressure Is Often Misunderstood
Engines do not simply “need backpressure.”
What matters is the overall behavior of the exhaust system, including:
- Exhaust velocity
- Pressure
- Pulse timing
- Scavenging
- Tube diameter
- Tube length
A restrictive exhaust can hurt performance.
An unnecessarily oversized system may also be poorly matched to an engine.
The goal is not maximum backpressure.
It is:
appropriate exhaust flow for the engine combination.
Turbocharged Applications
A 2.5-inch exhaust can work well on many moderate-output turbocharged applications.
Turbo engines often benefit from reducing unnecessary restriction downstream of the turbine.
The correct diameter depends on:
- Engine displacement
- Turbocharger size
- Boost pressure
- Target horsepower
- Catalytic converter
- Muffler configuration
Higher-output builds may require 3-inch or larger tubing.
Don’t choose exhaust diameter based solely on what looks impressive from behind the car.
Cutting Stainless Exhaust Pipe
Fabricating a system generally requires a clean, square cut.
Common tools include:
- Horizontal band saw
- Chop saw with suitable blade
- Reciprocating saw
- Tubing cutter designed for exhaust work
After cutting:
- Remove burrs.
- Clean the tube edges.
- Test-fit the components.
- Confirm orientation.
- Tack weld before completing the joint.
Measure twice.
Cut once.
Then measure again because apparently the first two measurements weren’t emotionally convincing enough.
Welding Stainless Exhaust Tubing
Professional fabrication commonly uses:
- TIG welding
- MIG welding with appropriate stainless wire and shielding gas
TIG can produce particularly clean stainless exhaust joints when performed correctly.
Good welding technique helps reduce:
- Exhaust leaks
- Cracking
- Excessive distortion
- Internal weld obstruction
If you’re not experienced with thin-wall stainless tubing, a professional exhaust shop may produce a much better finished system.
Tack Everything Before Final Welding
One of the easiest ways to ruin a custom exhaust is to fully weld each section before verifying the entire system.
A better process is:
Cut → Fit → Tack → Position → Check → Final Weld
Before final welding, confirm:
- Ground clearance
- Driveshaft clearance
- Suspension clearance
- Fuel-line clearance
- Brake-line clearance
- Body clearance
- Muffler position
- Exhaust-tip alignment
Exhaust tubing expands when hot, so don’t place it directly against the chassis when cold.
Exhaust Hangers Matter
Tubing should not be expected to support the entire exhaust system by itself.
Use appropriately positioned exhaust hangers to control:
- Vertical movement
- Lateral movement
- Vibration
- Stress at welds
Poor hanger placement can cause:
- Cracked welds
- Broken flanges
- Exhaust rattles
- Premature component failure
A custom system should move with the drivetrain without swinging underneath the car.
Allow Room for Thermal Expansion
Exhaust components become significantly hotter during operation.
The system expands as temperature rises.
Provide clearance around:
- Floorpan
- Fuel tank
- Brake lines
- Fuel lines
- Wiring
- Plastic panels
- Driveshaft
A system that clears everything by two millimeters in the garage may not clear everything once it reaches operating temperature.
Use Heat Protection Where Necessary
Custom exhaust routing may place tubing closer to sensitive components than the factory system did.
Heat protection may be required near:
- Fuel lines
- Brake lines
- Wiring harnesses
- Floor insulation
- Fuel tank
- Electronic modules
Do not route exhaust purely according to where the tubing fits easiest.
Heat management is part of exhaust design.
Universal Fitment Means Fabrication Required
This is not a vehicle-specific direct-fit replacement.
A universal exhaust tubing kit generally requires:
- Measuring
- Cutting
- Positioning
- Welding or clamping
- Hanger fabrication
That makes it appropriate for experienced DIY builders and professional exhaust shops.
It may not be appropriate for someone expecting to bolt an entire system onto factory mounting points in an afternoon.
Measure the Existing Exhaust First
Before ordering, measure your existing tubing.
Check the:
outside diameter
not just the circumference or what the old product description claims.
Common performance exhaust sizes include:
- 2.0 inches
- 2.25 inches
- 2.5 inches
- 3.0 inches
SPELAB’s own current cutout documentation advises customers to verify pipe size before installation.
See the SPELAB 2.5-Inch Electric Exhaust Cutout for an example of its current 2.5-inch exhaust hardware.
Street and Emissions Considerations
Replacing or fabricating exhaust tubing is not automatically illegal.
However, modifications must not unlawfully remove or bypass required emissions equipment.
Be particularly careful around:
- Catalytic converters
- Oxygen sensors
- Exhaust cutouts
- Emissions-related components
Noise regulations also vary by state and locality.
For California-oriented readers, our Is My Exhaust Legal? guide provides additional background, but always verify current state and local regulations before modifying a street-driven exhaust system.
Who Should Buy the SPELAB 2.5-Inch Exhaust Pipe Kit?
This product makes the most sense for someone fabricating a:
2.5-inch custom exhaust system
Potential applications include:
- Performance cars
- Muscle cars
- Trucks
- Turbo projects
- Restomods
- Street/strip builds
- Exhaust cutout installations
- Muffler replacements
- Resonator installations
It is particularly useful when a universal fabrication solution is preferred over a vehicle-specific bolt-on system.
Why Buy a SPELAB 2.5-Inch Stainless Exhaust Pipe Kit?
Key advantages include:
- 2.5-inch exhaust diameter
- Approximately 63.5mm tubing
- Stainless-steel construction
- Universal fabrication use
- Suitable for custom cat-back systems
- Useful for muffler and resonator installations
- Compatible with properly sized 2.5-inch exhaust hardware
- Useful when installing exhaust cutouts
- Suitable for custom street and performance builds
For builders who need raw material for a 2.5-inch custom exhaust, the SPELAB stainless tubing kit provides a useful starting point without locking the project into a vehicle-specific exhaust layout.
Specifications at a Glance
Brand: SPELAB
Product: Stainless Steel Exhaust Pipe Kit
Tube Diameter: 2.5 inches
Approximate Metric Diameter: 63.5mm
Material: Stainless steel
Application: Automotive exhaust fabrication
Fitment: Universal
Installation: Custom fabrication required
Typical Uses: Cat-back fabrication, muffler installation, resonator installation, exhaust repair and cutout installation
Important: Confirm the exact package contents, tube lengths, bends and stainless-steel grade from the current seller listing before publishing those details as specifications.





There are no reviews yet.