

What Is Included?
Each package contains:
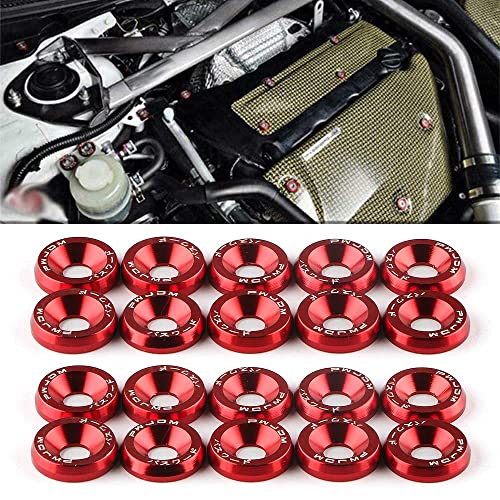
- 20 red anodized aluminum fender washers
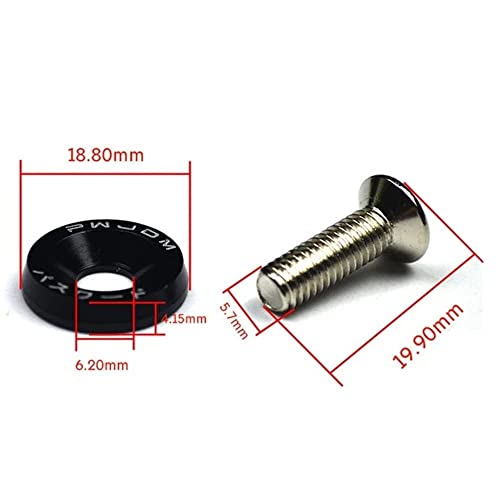
- 20 stainless-steel M6 × 20 mm bolts
No nuts, clips, rubber isolators, spacers or thread adapters are specified. Some installations may require retaining the original factory nut or threaded insert.
Check the complete package before removing original hardware.
M6 × 20 mm Does Not Guarantee Fitment
The bolt designation provides only part of the information needed to establish compatibility.
- M6 describes the nominal thread diameter.
- 20 mm generally describes the bolt length measured from beneath the head.
- Thread pitch is not supplied in the product description.
- Bolt-strength class is not supplied.
Many automotive M6 bolts use a 1.0 mm thread pitch, but that must not be assumed. Fine-thread, self-tapping and vehicle-specific fasteners also exist.
Before installation, compare:
- Thread diameter
- Thread pitch
- Bolt length
- Threaded depth
- Head clearance
- Washer outside diameter
- Washer thickness
- Factory shoulder design
- Captive-nut condition
- Required bolt grade
- Required torque
Our Vehicle Fitment Parts Guide explains why a part that looks correct in a photograph may still differ in the specification that actually matters.
Decorative Hardware, Not Structural Hardware
These bolts and washers should be treated as appearance hardware unless the manufacturer supplies a verified strength class and approves a specific load-bearing application.
Do not use them to replace fasteners securing:
- Suspension components
- Brake components
- Steering components
- Seat belts
- Seats
- Engine mounts
- Transmission mounts
- Hood hinges
- Hood latch
- Door hinges
- Fuel-system components
- Battery restraints
- Roll cages
- Chassis braces
- Tow hooks
- Structural bumper reinforcements
- Safety-critical lighting brackets where alignment depends on special hardware
A stainless bolt that fits the hole is not automatically equal to the factory bolt. The original fastener may use a specific strength class, shoulder, flange, coating or clamping design.
CNC-Machined Aluminum Washers
The decorative washers are machined from aluminum alloy and finished with red anodizing.
Benefits include:
- Lightweight construction
- Consistent machined appearance
- Bright red finish
- Resistance to conventional iron rust
- Wider visual footprint around the bolt
- Coordinated JDM-style appearance
- Easy installation at compatible locations
Anodizing improves the aluminum surface but does not make it immune to scratches, fading or corrosion. Engine heat, ultraviolet exposure, chemicals and repeated tool contact can change the finish over time.
Stainless-Steel M6 Bolts
The included stainless-steel bolts resist conventional surface rust better than untreated mild-steel hardware. However, stainless steel is not automatically stronger than every factory automotive bolt.
The supplied information does not identify:
- Stainless grade
- Metric property class
- Proof load
- Tensile strength
- Thread pitch
- Torque specification
Use the bolts only where their dimensions and strength are appropriate.
Common Compatible Locations
Potential mounting locations may include:
| Location | Fitment requirement |
|---|---|
| Fender edge | Existing nonstructural M6 threaded hole |
| Bumper-cover tab | M6 fastener with correct length and backing support |
| Headlight tab | Compatible noncritical mounting point and correct alignment |
| Radiator trim panel | M6 insert with adequate clearance |
| Trunk trim | Compatible M6 mounting point |
| License-plate frame | M6 thread confirmed for the vehicle or bracket |
| Motorcycle fairing | Correct thread, length and required spacer arrangement |
Do not force an M6 bolt into a different thread. Cross-threading a captive nut can turn a five-minute cosmetic upgrade into an afternoon involving drilling, swearing and new vocabulary.
How to Check Fitment
1. Remove One Factory Bolt
Work on one mounting point at a time so the panel remains aligned.
2. Compare the Bolts
Place the factory and replacement bolts side by side. Compare:
- Diameter
- Thread spacing
- Length
- Head design
- Shoulder
- Unthreaded section
- Tip shape
- Washer arrangement
3. Check Thread Pitch
Use a metric thread-pitch gauge or a verified matching nut. Do not rely solely on visual comparison.
4. Measure Available Depth
A replacement bolt that is too long may bottom out, damage wiring, contact a hidden component or crack a closed threaded insert.
5. Inspect the Panel
Confirm that the aluminum washer sits flat and does not concentrate pressure on a curved, brittle or unsupported plastic tab.
6. Confirm the Application Is Noncritical
If the bolt holds a safety-related or structural component, retain the specified factory fastener.
Installation Guide
Tools You May Need
- Metric socket or hex tool matching the supplied bolts
- Ratchet
- Torque wrench suitable for low torque
- Metric thread-pitch gauge
- Caliper or ruler
- Microfiber towel
- Plastic-safe cleaner
- Nylon washer or isolator where appropriate
- Manufacturer service information
1. Park Safely
Park on a level surface, switch off the engine and allow the engine compartment to cool.
2. Photograph the Original Hardware
Take a reference photograph before removing any bolts. This helps preserve washer order, bracket position and panel alignment.
3. Replace One Bolt at a Time
Removing an entire row can allow the fender, headlight or trim panel to move.
4. Inspect the Threaded Hole
Check for:
- Cross-threading
- Rust
- Damaged captive nut
- Loose threaded insert
- Paint buildup
- Debris
- Insufficient depth
Repair damaged mounting points before installing decorative hardware.
5. Position the Aluminum Washer
Place the washer against the panel with its finished surface facing outward.
If the washer could damage soft paint or plastic, use an appropriate thin isolator—provided it does not compromise clamping or alignment.
6. Start the Bolt by Hand
Turn the bolt several complete revolutions by hand. If resistance develops immediately, stop and verify the thread.
Never use an impact gun to start decorative hardware.
7. Tighten Carefully
Follow the vehicle manufacturer’s torque specification for that mounting point when the replacement hardware is approved for use there.
Aluminum washers and plastic panels can be damaged by excessive torque. Tighten only enough to secure the component correctly.
8. Inspect the Finished Installation
Check that:
- The washer sits flat.
- The panel remains aligned.
- The bolt is fully engaged.
- Nothing is pinched.
- No bolt protrudes into wiring or components.
- The washer does not spin freely.
- The original mounting function remains intact.
9. Recheck After Driving
Inspect the hardware after several heat cycles and normal driving. Retighten only if required and only to the proper specification.
Avoid Overtightening
Anodized aluminum washers can deform, scratch or cut into plastic when overtightened.
Excessive torque may:
- Crack a headlight tab
- Distort a bumper cover
- Damage paint
- Strip a captive nut
- Crush the washer
- Remove the anodized finish
- Break a plastic insert
- Misalign a body panel
More torque does not make decorative hardware more decorative.
Galvanic Corrosion Considerations
The kit combines aluminum washers and stainless-steel bolts. When dissimilar metals remain in electrical contact and are exposed to moisture or salt, galvanic corrosion may occur.
To reduce the risk:
- Keep the hardware clean and dry.
- Avoid prolonged road-salt contamination.
- Inspect periodically.
- Use appropriate isolating washers where the application permits.
- Replace damaged anodized washers.
- Follow vehicle-manufacturer guidance before applying anti-seize.
Lubricants and anti-seize compounds change the relationship between tightening torque and clamping force. Do not add them casually to a torque-critical joint.
Engine-Bay Heat and Chemical Exposure
Install the washers away from locations where they could contact:
- Exhaust components
- Turbocharger housings
- Open flame
- Fuel leaks
- Battery acid
- Brake fluid
- Strong solvents
- Moving belts
- Cooling fans
- Hood-latch mechanisms
Cleaners, degreasers and engine heat can fade or stain anodized finishes. Test detailing chemicals on one washer before treating the entire set.
Exterior Applications
When used around bumper covers, fenders or license plates, periodically inspect the hardware for:
- Loosening
- Finish fading
- Road-salt buildup
- Washer distortion
- Paint abrasion
- Rust on surrounding factory metal
- Water trapped beneath the washer
For exterior panels and body kits, hardware selection affects more than appearance. Our Car Body Kit Guide explains why mounting support and panel fitment should be planned before drilling or replacing fasteners.
Common Installation Mistakes
Assuming Every M6 Bolt Uses the Same Thread
Thread pitch, length, strength and shoulder design can differ.
Installing the Bolts in Structural Locations
Unknown bolt strength makes them unsuitable for safety-critical joints.
Using an Impact Gun
An impact tool can strip threads, crack plastic and damage the anodized finish almost instantly.
Replacing Special Shoulder Bolts
Some factory bolts locate a panel or permit controlled movement. A fully threaded decorative bolt may not perform the same function.
Ignoring Hidden Clearance
A 20 mm bolt may contact wiring, a closed insert or another component behind the panel.
Overtightening Plastic Tabs
Headlight and bumper tabs are easy to crack and annoying to replace.
Removing Too Many Bolts at Once
Body panels can shift, creating uneven gaps or poor alignment.
Applying Random Thread Locker
Some plastic parts and finishes can be damaged by particular thread-locking products. Use only when specified.
Cleaning the Red Anodized Finish
Use:
- Mild automotive soap
- Water
- Soft detailing brush
- Microfiber towel
- Aluminum-safe cleaner
Avoid:
- Abrasive polish
- Wire brushes
- Strong acids
- Caustic degreaser
- Metal scrapers
- Harsh wheel cleaner
- Repeated tool contact
Dry the hardware after cleaning to reduce water spotting and corrosion around adjacent metals.
Who Should Buy This Kit?
This fender-washer kit is suited to:
- JDM-inspired street builds
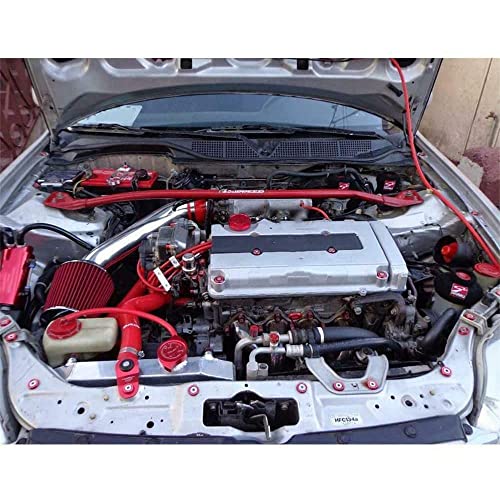
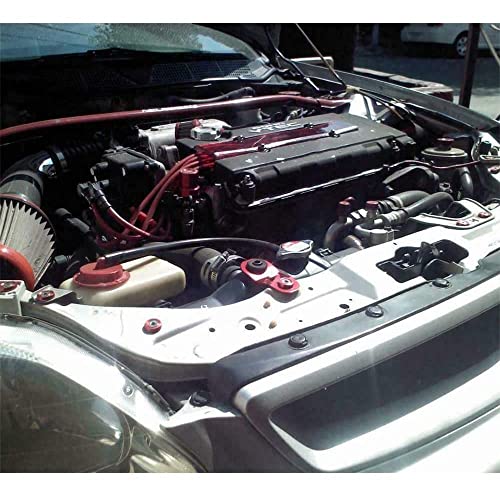
- Engine-bay dress-up projects
- Show cars
- Tuner cars
- Motorcycles with confirmed M6 body hardware
- Owners replacing compatible cosmetic fasteners
- Builders coordinating red engine-bay accents
- DIY enthusiasts who verify hardware specifications
It is not suitable for:
- Structural or safety-critical fasteners
- Unknown threaded holes
- Applications requiring a certified bolt grade
- High-temperature exhaust locations
- Damaged captive nuts
- Mounting points requiring special shoulder bolts
- Buyers assuming universal fitment
Frequently Asked Questions
What comes in the package?
The kit includes 20 red aluminum washers and 20 stainless-steel M6 × 20 mm bolts.
Are these bolts universal?
No. The mounting location must use the correct M6 diameter, thread pitch, length and strength requirement.
What is the thread pitch?
The supplied specifications do not identify it. Verify the exact product before ordering or installing.
Can these bolts hold suspension components?
No. They should not replace safety-critical or structural hardware.
Can they be used on fenders?
They may fit compatible nonstructural upper-fender mounting points after the factory bolt specifications are confirmed.
Can they be used for headlights?
Only at compatible noncritical M6 mounting tabs where bolt length and clamping design match. Do not compromise lamp alignment.
Will they fit a license-plate frame?
Possibly, but license-plate hardware varies by vehicle and bracket. Confirm the thread before installation.
Are the washers real aluminum?
The product describes them as CNC-machined aluminum alloy with an anodized finish.
Are the bolts aluminum?
No. The washers are aluminum alloy, while the supplied bolts are described as stainless steel.
Will the red finish fade?
Anodized finishes can fade or discolor with ultraviolet exposure, engine heat, chemicals and abrasion.
How tight should the bolts be?
Use the vehicle manufacturer’s specification for an approved compatible mounting point. Do not overtighten aluminum washers or plastic panels.
Is a warranty included?
Tempsnow advertises a 90-day return or replacement period. Confirm the current seller terms before purchase.
Final Thoughts
The red M6 JDM fender-washer kit offers an affordable way to coordinate compatible engine-bay and exterior hardware. Twenty anodized aluminum washers provide the color, while twenty stainless M6 × 20 mm bolts complete the package.
Verify the thread pitch, bolt length and mounting requirements before installation. Use the kit for compatible decorative and noncritical locations—not brakes, suspension or anything else responsible for keeping the vehicle in one piece.




There are no reviews yet.