

For help coordinating this kit with a larger exterior build, our guide to spoilers, wings and rear-aero upgrades explains how different styles affect appearance, mounting and everyday usability.
Durable ABS Plastic Construction
Each GLSOWEE shark fin is manufactured from ABS plastic. This material is commonly used for automotive exterior accessories because it is lightweight, relatively impact-resistant and easy to mold into consistent shapes.
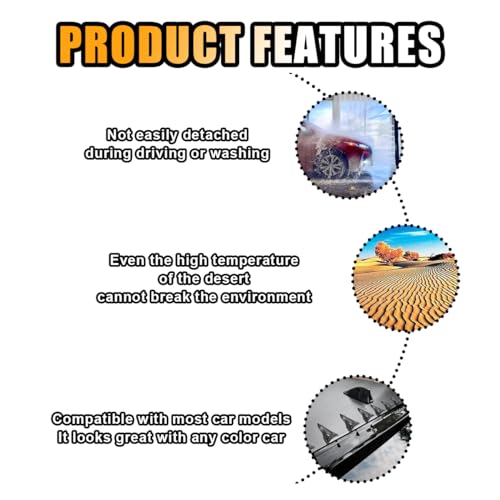
According to the product description, the smooth exterior surface is designed to resist normal exposure to sunlight and rain. The fins are also intended to remain attached in changing weather conditions when installed on a properly prepared surface.
However, long-term durability still depends on:
- Paint condition
- Surface preparation
- Installation temperature
- Adhesive quality
- Panel curvature
- Sun exposure
- Automatic car-wash use
- Pressure-washing technique
The carbon-fiber option describes the appearance of the surface. It should not be confused with genuine woven carbon-fiber construction.
Does the Shark Fin Kit Reduce Drag and Wind Noise?
GLSOWEE markets the streamlined design as helping reduce air resistance, roof noise and instability at higher speeds. Those benefits should be treated as manufacturer claims rather than guaranteed performance results.
A functional vortex generator must be engineered around a specific vehicle’s roof shape, airflow-separation point, rear-window angle and operating speed. Because this is a universal styling kit, no measurable improvement in downforce, fuel economy, wind noise or high-speed stability should be promised without vehicle-specific aerodynamic testing.
The dependable benefits are more straightforward:
- Sportier exterior appearance
- Customizable fin spacing
- Compact design
- Adhesive installation
- No full-size wing required
- Black or carbon-inspired finish
Buy this kit for the look. If it also silences a wind tunnel that apparently lives on your roof, consider that a bonus.
Universal Fitment for Cars, Trucks and SUVs
The kit is intended for use on most cars, trucks and SUVs, but “universal” does not mean every surface will provide a secure fit.
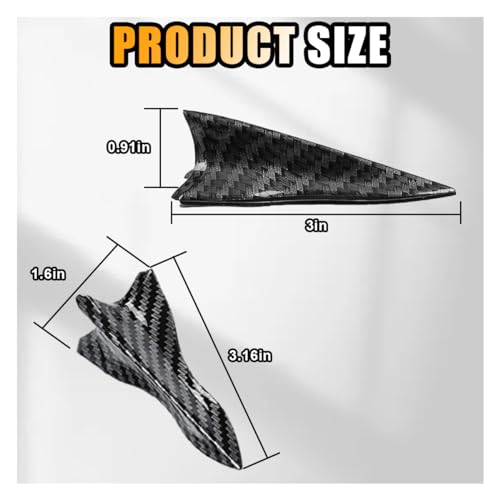
Each fin measures approximately three inches long, 1.6 inches wide and 0.91 inch tall. Before purchasing, measure the intended mounting area and calculate the spacing needed for all 10 pieces.
Our vehicle-fitment parts guide explains why body style, panel shape and nearby factory equipment matter even when a product is sold as universal.
Check These Areas Before Installation
Verify clearance around:
- Roof antennas
- Satellite-radio antennas
- Sunroofs
- Panoramic roof panels
- Roof racks
- Rear-window trim
- Hatch hinges
- Washer nozzles
- Factory spoilers
- Third brake lights
- Convertible-roof components
The mounting surface should be smooth, solid and dry. Deeply curved panels may prevent the flat adhesive base from making complete contact.
Do not install the fins on loose trim, rubber seals, textured plastic or movable sunroof glass.
Recommended Installation Locations
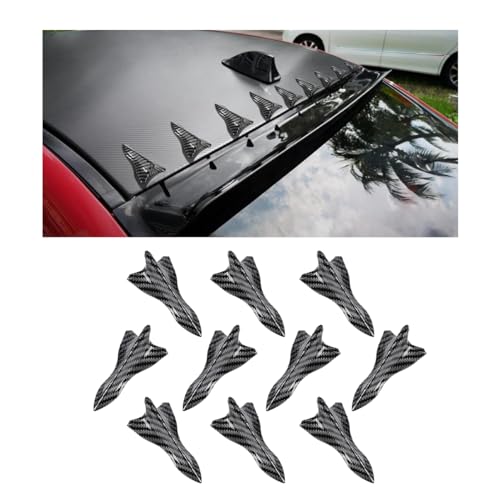
The rear section of the roof is the most natural installation point. Positioning the fins ahead of the rear window creates the familiar vortex-generator appearance while keeping the modification visually connected to the roofline.
Depending on the vehicle and panel shape, the fins may also be installed on:
- Roof spoilers
- Rear hatch panels
- Trunk lids
- Rear bumpers
- Custom body panels
- Show-car aero components
Always confirm that the location provides enough surface contact for the entire adhesive base.
If you are building a coordinated exterior package, the principles in our car body kit guide can help keep the roof fins, spoiler, side skirts and lower aero components working within one visual theme.
How to Install the GLSOWEE Shark Fin Kit
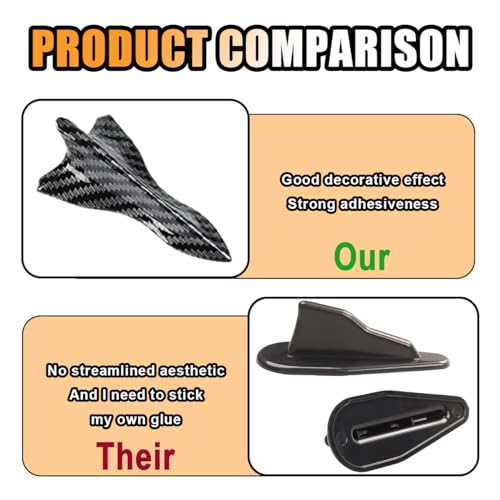
The kit uses self-adhesive backing, so installation should not require drilling, trimming or permanent body modification. Proper preparation is still essential.
What You May Need
- Automotive car-wash soap
- Clean microfiber towels
- Paint-safe surface cleaner
- Isopropyl-alcohol solution
- Painter’s tape
- Flexible measuring tape
- Removable marking pencil
- Hair dryer or low-temperature heat source
Do not use excessive heat. The goal is to warm the adhesive gently, not audition the roof for a paint-booth remake.
Step 1: Select the Mounting Area
Choose a smooth section of the roof, spoiler or exterior panel. Confirm that all 10 fins fit without interfering with moving panels or factory equipment.
Step 2: Wash and Dry the Surface
Wash the mounting area to remove dirt and road residue. Dry it completely with a clean microfiber towel.
Do not install the fins over wax, polish, ceramic detail spray or oily residue. Adhesive cannot grip the paint properly when a layer of detailing product sits between them.
Step 3: Inspect the Paint
Avoid installing the fins over:
- Peeling clear coat
- Rust
- Loose vinyl
- Cracked paint
- Freshly painted panels that have not cured
- Damaged or poorly bonded wraps
Removing adhesive accessories can lift weak paint or vinyl.
Step 4: Establish the Centerline
Find the center of the roof or mounting panel and mark it with painter’s tape. Measure from fixed reference points rather than relying on visual judgment.
Step 5: Lay Out All 10 Fins
Position every fin before removing the protective backing. Adjust the spacing until the row looks balanced from the rear and both sides of the vehicle.
Mark the front and side edges of each position with painter’s tape. Measuring now is considerably easier than explaining later why all 10 fins are slowly migrating toward the passenger side.
Step 6: Check Clearances
Operate the sunroof, hatch or trunk and confirm that nothing contacts the proposed mounting positions.
Check clearance around the antenna, rear glass and roof spoiler.
Step 7: Clean the Final Attachment Points
Use a paint-safe cleaner to remove remaining wax, oil and residue. Allow the surface to dry completely and avoid touching it with bare fingers.
Step 8: Warm the Adhesive if Necessary
When conditions are cool, gently warm the adhesive backing with a hair dryer. Follow the product instructions and avoid overheating the ABS plastic or vehicle paint.
Step 9: Attach Each Fin
Remove the protective film from one fin at a time. Carefully align it with the painter’s-tape guides and press it directly onto the panel.
Apply even pressure across the entire adhesive base. Do not slide the fin after it contacts the paint.
Repeat the process for the remaining pieces while checking alignment regularly.
Step 10: Allow the Adhesive to Bond
Avoid washing the vehicle, exposing the installation to heavy rain or driving at highway speeds until the adhesive has properly bonded.
Follow the adhesive manufacturer’s specified curing period. Different adhesive products may require different temperatures and bonding times.
Our aftermarket spoiler fitment guide provides additional advice for surface preparation, adhesive mounting and checking body-panel contours.
Installation Mistakes to Avoid
Installing Over Wax
Wax and paint sealant can prevent the adhesive from developing a secure bond.
Applying the Fins to a Wet Surface
Moisture trapped under the adhesive can weaken the attachment. The surface must be completely dry.
Installing Without Measuring
Because the kit contains 10 separate pieces, a small positioning error can become extremely noticeable by the end of the row.
Mounting on a Severe Curve
The entire adhesive base needs surface contact. If the panel curves away from the base, the fin may eventually lift.
Blocking a Sunroof or Hatch
Test every moving panel before removing the adhesive backing.
Using Excessive Heat
Gentle warming can improve initial adhesive tack in cool conditions. Excessive heat can distort plastic, damage paint or weaken the adhesive.
Pressure-Washing the Edges
Directing high-pressure water beneath the fins may lift the adhesive. Maintain a safe distance and avoid concentrating water at the mounting edges.
Care and Maintenance
Inspect the fins regularly, especially after:
- Highway driving
- Heavy rain
- Automatic car washes
- Extreme heat
- Freezing weather
- Pressure washing
Press lightly around each base and check for lifting edges. A loose fin should be removed and remounted with appropriate exterior automotive tape rather than left to detach on the road.
Wash the surface with automotive-safe soap and a soft microfiber towel. Avoid abrasive compounds or harsh solvents that may damage the carbon-fiber-look finish.
Can the Fins Be Removed?
Because the fins use adhesive rather than drilled fasteners, they can generally be removed without leaving permanent holes.
Warm each piece gradually and use automotive trim-removal line or another paint-safe technique to separate the adhesive. Remaining residue can be removed with an automotive adhesive remover approved for the paint.
Do not use a metal scraper or screwdriver against the body panel.
Older, repainted or damaged surfaces may still lift during removal. Test carefully before removing the entire set.
Who Should Buy This Shark Fin Kit?
The GLSOWEE 10-piece kit is a good choice for drivers who want:
- An inexpensive exterior modification
- Carbon-fiber-look styling
- A more aggressive roofline
- Customizable fin spacing
- Installation without drilling
- A universal accessory for a suitable vehicle
- A subtle alternative to a large wing
It may not be suitable for drivers who require:
- Genuine carbon-fiber construction
- Proven aerodynamic performance
- Vehicle-specific molded fitment
- Guaranteed wind-noise reduction
- A functional track-aero component
- Installation on a heavily curved or textured panel
Frequently Asked Questions
What comes with the GLSOWEE shark fin kit?
The kit includes 10 individual automotive shark-fin-style pieces with self-adhesive backing.
How large is each fin?
Each fin measures approximately 3 inches long, 1.6 inches wide and 0.91 inch tall, or 7.62 × 4.06 × 2.31 centimeters.
What are the fins made from?
The fins are manufactured from ABS plastic.
Is the carbon-fiber version genuine carbon fiber?
No genuine composite construction has been specified. It should be described as a carbon-fiber-look or carbon-fiber-pattern finish.
Will this kit fit my vehicle?
The kit is marketed for most cars, trucks and SUVs. Actual fitment depends on the available mounting area, panel curvature and clearance around the antenna, sunroof, hatch and roof equipment.
Does installation require drilling?
No. The fins use self-adhesive backing and are intended to install without drilling or trimming.
Can the fins be installed on a bumper?
The manufacturer lists bumpers as a possible installation area. The selected location must be smooth, clean and shaped to provide full contact with the adhesive base.
Will the fins reduce wind noise?
The manufacturer claims the streamlined design can reduce air resistance and noise. Results will vary, and no vehicle-specific reduction should be guaranteed without controlled testing.
Do the fins improve high-speed stability?
The manufacturer promotes improved stability, but this universal kit has not been shown to produce a specific aerodynamic benefit on every vehicle. Treat it primarily as an appearance accessory.
Can I install the fins in cold weather?
Cold temperatures can reduce adhesive performance. Install them within the adhesive manufacturer’s recommended temperature range and gently warm the backing when permitted.
Final Thoughts
The GLSOWEE 10PCS Car Diffuser Shark Fin Kit provides an easy way to add black or carbon-inspired styling to the roof, spoiler or another compatible exterior panel.
Its ABS construction, compact three-inch dimensions and self-adhesive mounting make it accessible for a DIY installation. The individual pieces also allow owners to customize the spacing around their particular roofline.
Just keep the expectations grounded. This is an attractive universal styling accessory, not a substitute for a vehicle-specific aerodynamic package. Measure carefully, clean the surface and install all 10 pieces in a straight, balanced arrangement. That is what separates a sharp roof upgrade from a plastic fin migration event.





There are no reviews yet.