
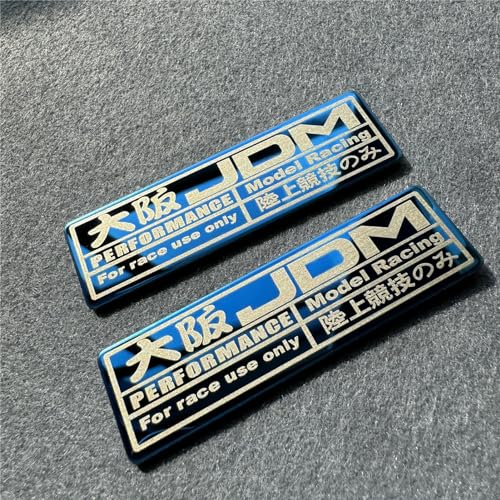
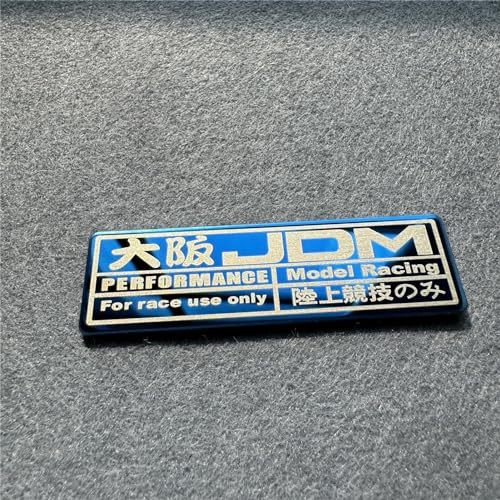
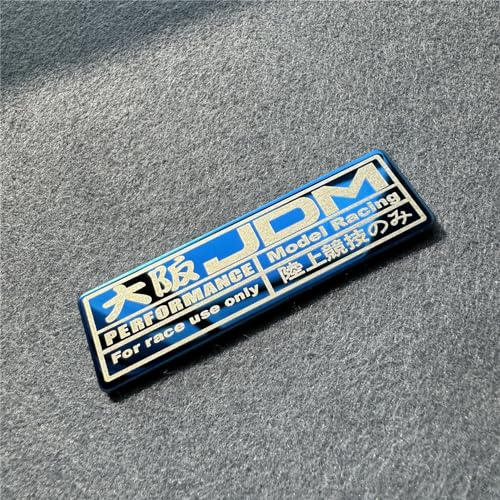
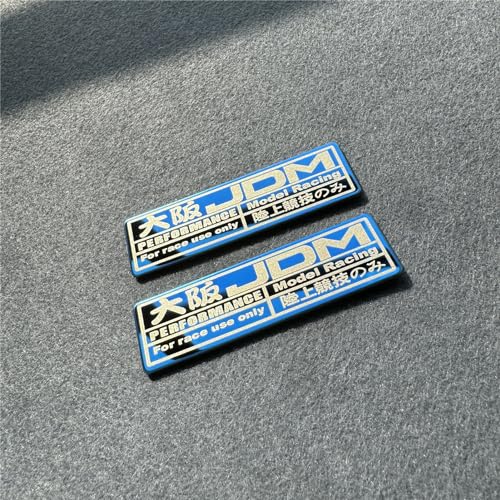
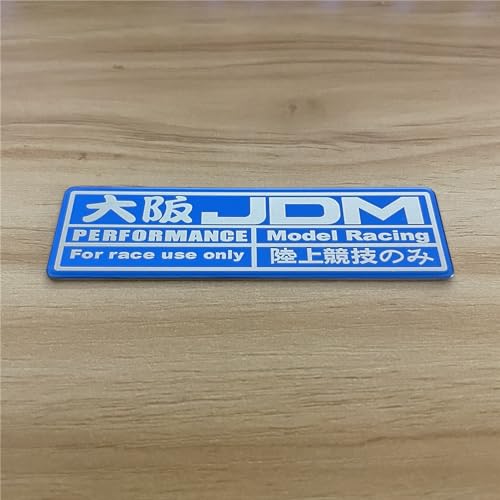
Thin Stainless-Steel Construction
Unlike an ordinary printed vinyl sticker, this product uses a thin stainless-steel base. That gives each badge a more rigid, metallic appearance while still allowing adhesive installation.
Potential benefits include:
- Sharper edges than a paper label
- Metallic surface finish
- Greater resistance to ordinary handling
- Easy wipe-down cleaning
- Suitable appearance for interior or exterior trim
- No drilling or permanent fasteners
The stainless-steel badge should still be handled carefully. Thin metal can bend or crease during installation, and its edges may be sharper than those of a conventional vinyl decal.
Do not install the badge where an edge can contact the driver’s hands, knees or clothing.
What Is Included?
Each package contains:
- Two blue stainless-steel adhesive badges
- “Danger Ejection Seat” racing-inspired graphics
- Adhesive backing on each piece
The product does not include an actual switch, wiring harness, seat-release mechanism or any other functional component.
That last part is important if your passenger has been criticizing the build.
Suitable Installation Locations
The compact 70 × 20 mm dimensions allow the badges to fit on many smooth surfaces.
Possible automotive locations include:
- Center-console trim
- Glove-box trim
- Flat dashboard accents
- Door-sill areas
- Non-deployment portions of door panels
- Switch-delete panels
- Gauge surrounds
- Seat bases away from moving hardware
- Toolboxes
- Garage cabinets
- Show-display boards
The badges may also be used on:
- Motorcycles
- Guitars
- Refrigerators
- Laptop cases
- Desktop computers
- Storage cabinets
- Gaming equipment
- Smooth phone or tablet cases
Always test adhesion and material compatibility before committing to a visible surface.
Do Not Install It Over a Steering-Wheel Airbag
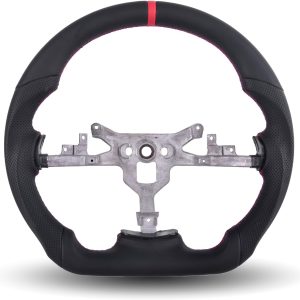
Although some product descriptions call this a steering-wheel decal, installing a metal badge over the center of an airbag-equipped steering wheel is unsafe.
Do not place it on:
- The driver airbag cover
- Passenger airbag panels
- Steering-wheel horn pads
- Airbag seam lines
- Steering-wheel buttons
- Paddle shifters
- Heated steering-wheel controls
- Column switches
- Any supplemental-restraint deployment area
During a collision, an attached metal object could detach or interfere with airbag-cover operation. The steering-wheel airbag module is part of a carefully monitored safety circuit, as explained in our B0072 driver-airbag diagnostic guide.
“Racing Use Only” is printed styling—not permission to attach stainless steel to an explosive safety device.
Other Areas to Avoid
Do not install the badge where it could interfere with:
- Vehicle controls
- Gear-selector movement
- Parking-brake operation
- Pedal movement
- Instrument visibility
- Air vents
- Windshield visibility
- Seat tracks
- Seatbelt buckles
- Cupholder operation
- Infotainment buttons
- Driver-assistance cameras
- Airbag deployment paths
Avoid placing it directly over warning labels, VIN plates, certification labels or legally required information.
Surface Compatibility
The adhesive should work best on a smooth, flat and clean surface.
Good candidates include:
- Painted metal
- Smooth interior plastic
- Glass
- Stainless steel
- Aluminum panels
- Sealed laptop cases
- Smooth toolboxes
- Finished appliance surfaces
Poor candidates include:
- Textured dashboards
- Soft-touch rubber coatings
- Leather
- Fabric
- Vinyl grain
- Curved steering-wheel trim
- Greasy surfaces
- Silicone-treated plastic
- Peeling paint
- Rust
- Hot engine components
- Unsealed porous material
Textured panels reduce adhesive contact. Even an aggressive adhesive cannot grip valleys it never touches.
How to Install the Ejection-Seat Badges
Installation requires no drilling or special tools, but careful preparation improves the finished result.
What You May Need
- Clean microfiber towel
- Mild interior cleaner
- Isopropyl-alcohol surface cleaner
- Painter’s tape
- Measuring tape
- Low-temperature hair dryer, if permitted
- Protective gloves for handling the metal edges
Step 1: Select a Safe Surface
Choose a flat location that remains clear of airbags, controls and moving components.
Place the badge against the surface before removing the backing and verify that all four edges sit flat.
Step 2: Test the Cleaner
Before cleaning a visible interior panel, test the chosen product in an inconspicuous area. Some soft-touch coatings and painted trim can discolor when exposed to alcohol or strong solvents.
Step 3: Clean the Mounting Area
Remove:
- Dust
- Grease
- Wax
- Silicone dressing
- Interior protectant
- Fingerprints
- Cleaning residue
Allow the surface to dry completely.
Surface preparation matters with any adhesive-mounted accessory. Our guide to installing car camera mounts explains why textured material, contamination and panel curvature commonly cause adhesive failure.
Step 4: Test the Alignment
Hold the badge in place with its backing attached. Use painter’s tape to mark the top and side edges.
For two badges installed near each other, measure their spacing before attaching either one.
Step 5: Remove the Protective Backing
Peel the backing away without touching the adhesive. Oils from your fingers can reduce adhesion.
Step 6: Position the Badge
Align one edge with the painter’s-tape guides and lower the badge gradually onto the panel.
Because the stainless-steel base is more rigid than vinyl, repositioning may bend the badge or weaken the adhesive.
Step 7: Apply Even Pressure
Press across the complete surface, working from the center toward the edges.
Do not apply excessive pressure to fragile dashboard trim, screens or thin plastic panels.
Step 8: Allow the Adhesive to Bond
Avoid pulling, washing or exposing the badge to heavy moisture until the adhesive has reached its recommended bond strength.
Exact bonding time depends on the supplied adhesive and installation temperature.
Outdoor Installation Considerations
The seller describes the badges as water-resistant, UV-resistant and suitable for outdoor use. Actual durability depends on:
- Surface preparation
- Adhesive quality
- Sun exposure
- Temperature cycling
- Pressure washing
- Road salt
- Car-wash chemicals
- Panel curvature
- Installation location
Exterior locations should remain clear of moving components and direct heat.
Do not install the badge:
- Near an exhaust outlet
- On brake components
- On a radiator
- Against engine heat shields
- On a motorcycle fuel cap
- Where it could detach into traffic
- Across panel gaps
- On flexible bumper areas that bend repeatedly
Check exterior badges periodically for lifting edges.
Cleaning the Badges
Use mild automotive soap or interior cleaner with a soft microfiber towel.
Avoid:
- Abrasive polish
- Metal scouring pads
- Harsh solvents
- Acidic wheel cleaner
- Razor blades
- Direct pressure washing at the edges
- Excessive scrubbing over the printed design
Spray cleaner onto the towel rather than directly onto dashboard electronics or panel seams.
How to Remove the Badges
Warm the badge gently with a hair dryer and lift one edge using a plastic trim tool or adhesive-removal line.
Pull slowly at a low angle. Remove remaining residue with a cleaner approved for the underlying material.
Do not use a screwdriver or metal scraper on dashboard plastic.
Older interiors, repainted panels and soft-touch coatings can be damaged by strong adhesive. Our dashboard repair guide explains how previous accessory installations and excess adhesive can leave permanent marks on interior surfaces.
A Small Gift for Car Enthusiasts
The two-piece set can make an inexpensive gift for drivers who enjoy:
- Japanese tuner culture
- Racing-themed interiors
- Aircraft-style warning graphics
- Drift builds
- Track cars
- Motorcycles
- Gaming setups
- Garage decoration
- Automotive humor
Because the badges do not require vehicle-specific engine, suspension or transmission information, they are easier to gift than most performance parts.
No one has to quietly ask whether a 1998 Civic badge fits a 2008 Civic while trying not to hurt your feelings.
Frequently Asked Questions
How many badges are included?
The package contains two adhesive badges.
What size is each badge?
Each piece measures approximately 70 × 20 mm, or 2.76 × 0.79 inches.
What color are the badges?
They have a shiny blue finish.
What are they made from?
The badges use a thin stainless-steel construction with laser-printed graphics.
Are they ordinary vinyl stickers?
No. They are described as stainless-steel adhesive badges rather than flexible vinyl decals.
Can they be installed on a steering wheel?
Do not install them over an airbag cover, horn pad, steering-wheel control or any other safety component.
Are the badges waterproof?
The seller describes them as water-resistant and UV-resistant. Long-term durability will depend on installation and exposure.
Can they be installed outside the vehicle?
Yes, on a compatible smooth surface. Avoid extreme heat, flexible panels and locations where a loose badge could create a hazard.
Will they stick to textured dashboards?
Adhesion may be poor because the metal backing cannot conform fully to textured surfaces.
Can they be removed?
Yes, but removal may damage weak paint, soft-touch coatings or aged interior surfaces. Warm the adhesive and proceed slowly.
Do they operate an ejection seat?
No. They are purely decorative. Please continue using the passenger door for routine departures.
Final Thoughts
The blue two-piece “Danger Ejection Seat” badge set adds a small racing-inspired detail to a car, motorcycle, laptop, toolbox or other smooth surface. Its stainless-steel construction and compact 70 × 20 mm size provide a more finished appearance than a large novelty sticker.
Choose a flat location, clean the surface and keep the metal badges completely away from airbags, controls and driver sightlines. Positioned correctly, they add humor without compromising the interior’s operation.
Your car still does not have an ejection seat. Given how some passengers behave around freshly detailed interiors, perhaps that is unfortunate.







There are no reviews yet.