

Adjustable Acura RSX Suspension for Street and Performance Driving
The Acura RSX remains a popular tuning platform because it combines a lightweight chassis, responsive steering and Honda’s K-series engine family. However, every North American RSX is now approximately two decades old.
Original dampers, rubber bushings, ball joints and tie-rod ends may no longer deliver the control they provided when new. The most common Acura RSX problems after 20 years include worn struts, suspension bushings, sway-bar links and steering components.
Installing adjustable coilovers gives you the ability to replace tired dampers while changing the RSX’s ride height and suspension response. The result depends heavily on installation quality and setup. A sensible alignment and moderate drop will generally produce a better street car than simply lowering everything until the tires disappear behind the fenders.
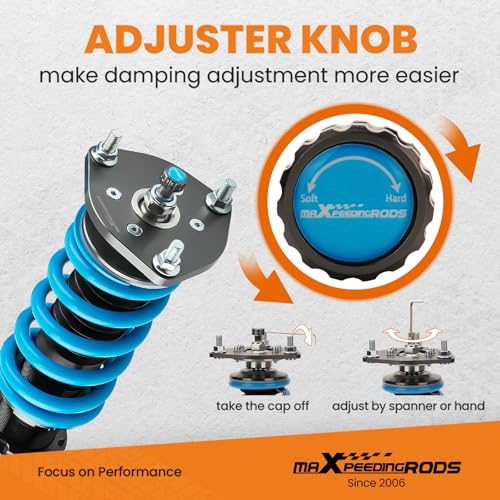
24 Levels of Damping Adjustment
The T6 Series dampers provide 24 adjustment positions, allowing you to change suspension firmness for different roads and driving conditions.
The manufacturer suggests the following general ranges:
| Adjustment range | Suggested application |
|---|---|
| Levels 0–8 | Street driving and daily use |
| Levels 9–16 | Winding roads and performance street driving |
| Levels 17–24 | Closed-course or track-oriented driving |
These ranges are starting points rather than universal settings. Tire construction, road quality, vehicle weight, alignment and driving style all affect the ideal adjustment.
Begin near the softer end of the range and change the settings in small, equal increments. Test the car after each adjustment on a familiar road. Record the front and rear positions so you can return to a previous setup.
More damping does not automatically create more grip. Excessive stiffness can make the tires skip across rough pavement instead of remaining planted.
For additional setup context, read Lowering Springs vs. Coilovers.
Front and Rear Spring Rates
This kit uses:
- Front: 8 kg/mm or 448 lb/in
- Rear: 6 kg/mm or 336 lb/in
The firmer front springs help control weight transfer and body movement during braking and corner entry. The rear rate supports the DC5 chassis without making the back of the vehicle unnecessarily harsh for normal road use.
According to the manufacturer, the springs undergo 600,000 continuous compression cycles with less than 0.04 percent measured distortion. That is a manufacturer-supplied durability claim, not a promise that the complete suspension will never require service.
Ride quality will be firmer than the factory RSX suspension. Tire sidewall, wheel diameter, damper settings, road conditions and ride height will all influence how the finished car feels.
Recommended Spring Preload
The listed spring-preload range is 7–10 mm.
Spring preload and ride height are not interchangeable adjustments. Preload establishes how the spring is seated and initially loaded when the suspension is extended. Ride height should be adjusted through the method specified for this coilover design.
Adding unnecessary preload to raise the vehicle or compensating for incorrect height adjustment can produce poor droop travel, harsh suspension behavior or an improperly seated spring.
Use the supplied installation instructions and confirm the adjustment procedure before changing preload.
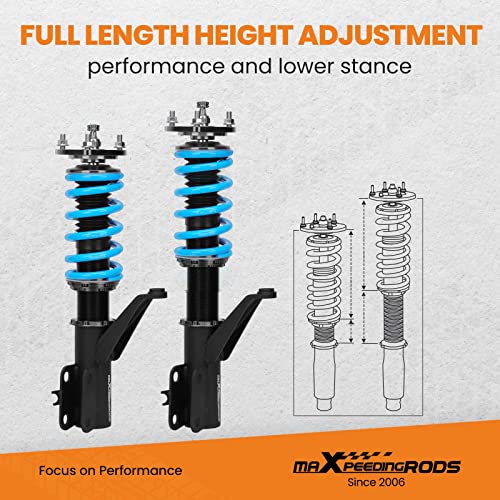
Adjustable Ride Height
The threaded coilover bodies allow the RSX to be lowered approximately 1 to 3 inches from its original height.
A moderate drop can provide:
- A lower center of gravity
- Reduced fender gap
- Less body movement
- Quicker steering response
- A more aggressive DC5 stance
The lowest available setting is not necessarily the best setting. Excessive lowering can reduce usable suspension travel and introduce additional negative camber, bump steer, poor axle angles and tire-clearance problems.
The RSX uses an independent strut front suspension and double-wishbone rear arrangement. Lowering therefore changes the front and rear suspension geometry in different ways. Factory specifications and baseline alignment information can be found in the Acura RSX Factory Specs Breakdown. www.honda.com
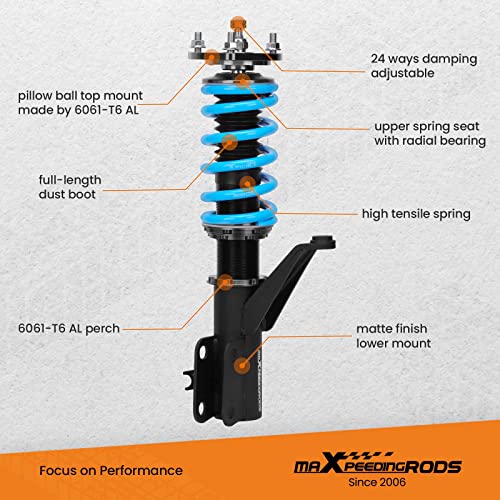
T6 Series Construction
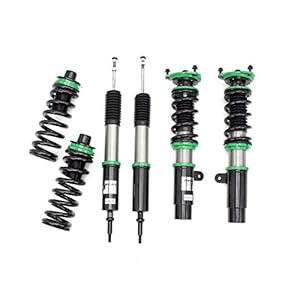
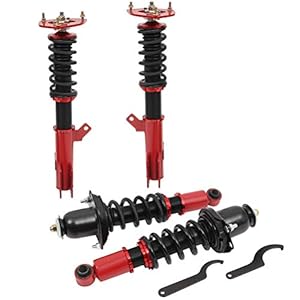
These maXpeedingrods coilovers are part of the upgraded Street Performance T6 Series.
Specified construction features include:
- Upgraded damping-adjustment knobs
- Higher-viscosity damper oil
- Aluminum upper plates
- High-tensile springs
- Threaded height-adjustment components
- Corrosion-resistant exterior finishes
- Monotube damper construction
A monotube damper separates the gas and hydraulic oil within a single-cylinder design. This can improve heat dissipation and produce more consistent damping during repeated suspension movement.
The blue finish also gives the suspension a distinctive appearance, although most of it will spend its life hiding behind the wheels and collecting evidence of every wet road you have driven through.
Improved Handling You Can Feel
Properly installed and adjusted coilovers can change how quickly an RSX responds to steering, braking and weight transfer.
Potential improvements include:
- Reduced body roll
- More controlled brake dive
- Quicker directional changes
- Improved steering response
- More consistent suspension movement
- Adjustable ride firmness
- Improved chassis balance
- A lower and more purposeful stance
The final result still depends on the condition of the rest of the vehicle. Coilovers cannot correct loose ball joints, damaged control-arm bushings, worn wheel bearings or tires that were selected primarily because they were available.
Check the Acura RSX wheel-bearing play specification if looseness is detected during installation.
Street, Back-Road and Track Setup
Daily Street Setup
For a street-driven RSX, begin with:
- Moderate ride-height reduction
- Softer damping positions
- Equal left-to-right settings
- Adequate suspension travel
- Conservative alignment
- Verified tire and fender clearance
This provides room for passengers, road irregularities and steep driveways without forcing the suspension to operate near the end of its travel.
Performance Street Setup
For winding roads or autocross-style use:
- Increase damping gradually
- Confirm the vehicle remains stable over uneven pavement
- Monitor front tire contact
- Check rear rotation under lift-throttle conditions
- Record each adjustment
- Inspect tire wear regularly
A front-wheel-drive performance car needs usable front grip. Making the front suspension excessively stiff may reduce traction when accelerating over imperfect pavement.
Track-Oriented Setup
For closed-course use:
- Start below the maximum setting
- Increase firmness only when the car’s behavior supports the change
- Check tire pressures and temperatures
- Inspect fasteners between sessions
- Confirm brake and tire clearance
- Recheck alignment after major ride-height changes
Track settings may be uncomfortable and counterproductive on rough public roads.
For a broader discussion of practical setup choices, see the 7 Best Coilovers for Daily Driving.
Direct-Fit Installation
These coilovers are designed around the factory suspension mounting locations of the DC5 Acura RSX and Honda Integra.
Installation should not ordinarily require welding or fabrication on an unmodified vehicle. However, original brackets, fasteners or ancillary hardware may need to be reused or transferred depending on the exact kit configuration.
Before installation, inspect:
- Front lower control arms
- Rear control-arm bushings
- Ball joints
- Tie-rod ends
- Sway-bar end links
- Wheel bearings
- Axle boots
- Brake hoses
- ABS sensor wiring
- Suspension mounting points
- Tires and wheels
Replacing the dampers while ignoring a loose ball joint is less of an upgrade and more of a scheduling conflict with a future tow truck.
Installation Overview
Professional installation is recommended. Coil springs store considerable energy and must be handled with the correct equipment.
A typical installation includes:
- Park the vehicle on level ground.
- Record the original ride height at each corner.
- Loosen the wheel fasteners before lifting the vehicle.
- Raise and support the RSX at approved lift points.
- Remove the wheels.
- Support the suspension components before removing the original dampers.
- Disconnect brackets, end links or lines as required.
- Remove the factory front and rear suspension assemblies.
- Compare each coilover with the component it replaces.
- Confirm spring seating and preload.
- Set matching left-to-right starting heights.
- Install the front and rear coilover assemblies.
- Route brake hoses and ABS wiring correctly.
- Tighten all mounting hardware using factory torque specifications.
- Reinstall the wheels and lower the vehicle.
- Roll or drive the car carefully to settle the suspension.
- Measure the ride height again.
- Adjust the height in small increments.
- Check tire, axle, brake-hose and body clearance.
- Perform a four-wheel alignment.
Never support the vehicle with a hydraulic jack alone.
Set the Ride Height Before Alignment
Complete the major ride-height adjustments before paying for an alignment. Changing the height afterward can alter camber and toe.
Measure each corner from the wheel center to a fixed point on the fender rather than measuring from the ground. Ground measurements can be distorted by tire-pressure and tire-diameter differences.
After settling the vehicle:
- Compare left and right measurements
- Confirm the springs remain seated
- Check suspension clearance
- Verify adequate travel
- Inspect axle and tie-rod angles
- Confirm that the tires do not contact the body
- Lock every adjustment collar securely
Four-Wheel Alignment Required
A four-wheel alignment is essential after installing coilovers.
Lowering an RSX can change:
- Front toe
- Rear toe
- Front camber
- Rear camber
- Steering-wheel position
- Straight-line stability
- Tire wear
The Acura RSX maintenance guide lists original alignment targets, but a lowered car may require a different specification based on ride height and intended use.
For an explanation of camber, caster and toe, see Wheel Alignment 101.
Do not assume that visibly aggressive negative camber is helping performance. Excessive camber combined with incorrect toe can destroy the inside edge of a tire while the outside still looks perfectly healthy.
Check Wheel and Tire Clearance
Ride-height changes should be verified with the actual wheels and tires installed.
Check clearance at:
- Front fender liners
- Rear quarter-panel edges
- Inner wheel wells
- Spring seats
- Brake hoses
- ABS wiring
- Tie rods
- Axles
- Sway-bar links
Turn the steering from lock to lock and inspect clearance while the suspension is loaded. Recheck with passengers or cargo if the vehicle will regularly carry additional weight.
Initial Damper Setup
A practical starting procedure is:
- Confirm which direction increases firmness.
- Set all four dampers near the softer end of the range.
- Drive the car over a familiar route.
- Increase adjustment by two or three positions.
- Evaluate steering response and ride control.
- Continue in small steps.
- Record the final front and rear settings.
The front and rear do not necessarily need identical settings. What matters is maintaining predictable chassis behavior.
If the car bounces repeatedly after a bump, additional damping may be needed. If it skips, chatters or loses grip over rough pavement, the setting may be too firm.
Post-Installation Checks
Reinspect the suspension after the first 50–100 miles and periodically afterward.
Check:
- Upper and lower mounting fasteners
- Adjustment collars
- Spring seating
- Brake-hose brackets
- ABS sensor wiring
- End-link clearance
- Tire contact marks
- Fluid leakage
- Unusual noise
- Alignment and steering-wheel position
A faint settling noise immediately after installation can occur, but persistent clunks, binding or metallic contact should be investigated.
Package Contents
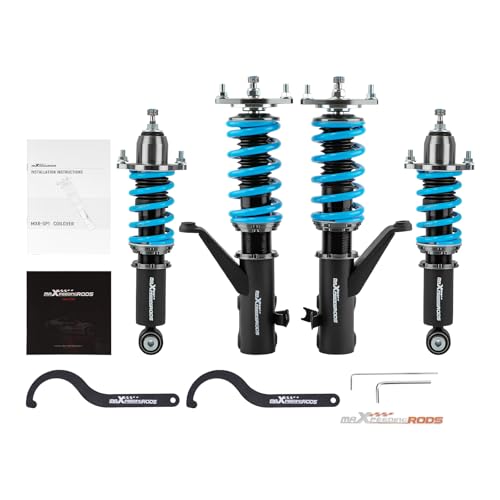
The kit is intended as a complete four-corner coilover package for the applicable RSX or Integra DC5.
Confirm the current seller listing for exact contents, which may include:
- Two front coilover assemblies
- Two rear coilover assemblies
- Damping-adjustment hardware
- Height-adjustment spanner wrenches
- Installation documentation
Factory hardware may need to be reused.
Why Choose These Coilovers for an Acura RSX?
These coilovers are aimed at RSX owners who want more adjustment than a conventional lowering-spring and replacement-damper package provides.
They offer:
- RSX-specific mounting dimensions
- Base and Type-S compatibility
- 24-position damping adjustment
- Approximately 1–3 inches of lowering
- 8K front and 6K rear springs
- T6 Series aluminum components
- Monotube damper construction
- Street and performance tuning flexibility
- A complete front and rear suspension package
They are particularly suitable for a project that needs adjustable ride height without moving immediately into a premium motorsport suspension budget.
Frequently Asked Questions
Do these coilovers fit the Acura RSX Type-S?
Yes. The kit is listed for the 2002–2006 Acura RSX Base and Type-S.
Will they fit a Honda Integra DC5?
The kit is also listed for applicable 2001–2006 Honda Integra DC5 models. Verify the chassis code, market specification and suspension mounting points before purchase.
How much will these coilovers lower an RSX?
The listed adjustment range is approximately 1–3 inches below the original ride height. The kit is not designed to retain stock height.
Are these coilovers suitable for daily driving?
Yes, provided they are installed correctly and configured at a reasonable height with sensible damping settings. A moderate drop and softer damper adjustment will generally be better for daily use.
Are they suitable for track days?
The 24-level adjustment allows firmer settings for occasional closed-course use. Track performance also depends on tires, brakes, alignment, bushings and driver experience.
What are the spring rates?
The front springs are 8 kg/mm or 448 lb/in. The rear springs are 6 kg/mm or 336 lb/in.
What preload should I use?
The manufacturer specifies 7–10 mm of spring preload. Follow the kit’s instructions and do not use excessive preload as a substitute for proper ride-height adjustment.
Do I need an alignment?
Yes. A complete four-wheel alignment should be performed after installation and after any substantial ride-height change.
Will I need a camber kit?
That depends on the final ride height and desired alignment. A moderate drop may align within an acceptable range, while an aggressive drop may require additional camber-adjustment components.
Will these coilovers eliminate body roll?
They can reduce body roll, but they will not eliminate it entirely. Tire grip, sway bars, vehicle weight and suspension geometry also influence roll behavior.
Can I install them myself?
An experienced DIY technician with proper tools may be able to complete the installation. Professional installation is recommended if you are unfamiliar with suspension work or stored spring energy.
Do these coilovers retain factory ride comfort?
Expect a firmer ride than the original RSX suspension. Damper adjustment lets you tune the response, but an 8K/6K lowering setup will not feel identical to stock.
Final Thoughts
The maXpeedingrods T6 coilover kit for the 2002–2006 Acura RSX provides the core adjustments most street enthusiasts want: ride height, 24-level damping control and a balanced 8K/6K spring package.
It can give a Base or Type-S sharper responses, less body movement and a more purposeful stance. The best results will come from a moderate drop, careful damper tuning and a proper four-wheel alignment—not from lowering the car until road reflectors become structural threats.
Watch the supplied Acura RSX coilover video for an additional look at the application.
For more suspension information, visit:
- Car Suspension Upgrades
- Daily Driver Suspension Example
- How to Upgrade Sway Bars
- Air Suspension vs. Coilovers
- Acura RSX K20A2 vs. K20A3 Differences



There are no reviews yet.