
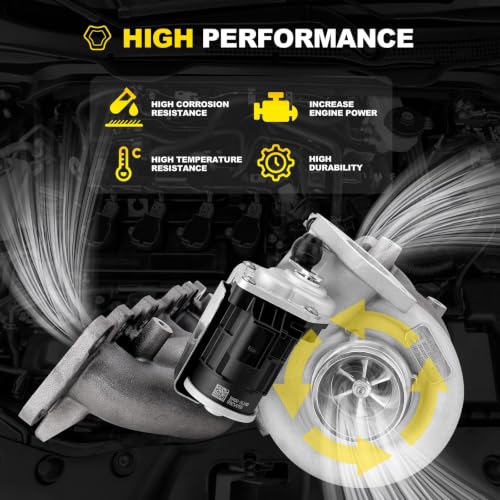
28231-2GTA1 TD04L6 Turbocharger Kit for Hyundai and Kia 2.0T
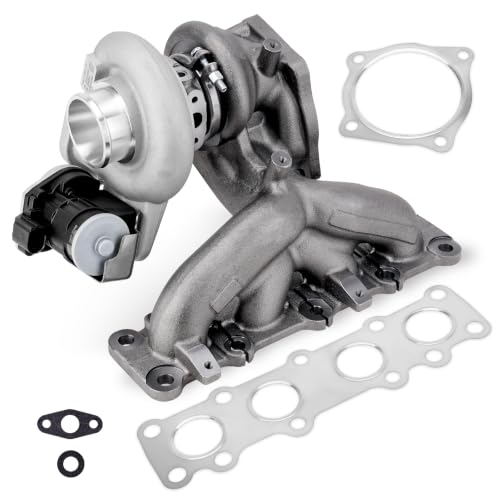
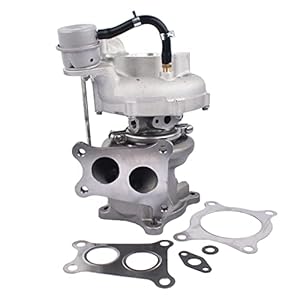
Restore factory-style boost response with this 28231-2GTA1 replacement turbocharger kit for select Hyundai and Kia vehicles equipped with the Theta II 2.0L turbocharged gasoline engine. The package includes the complete TD04L6 turbo assembly, metal mounting gaskets and an oil-return gasket.
This direct-replacement turbo is intended to restore normal boost delivery, acceleration and drivability. It is not an oversized performance upgrade and should not require custom fabrication when installed in the correct factory application.
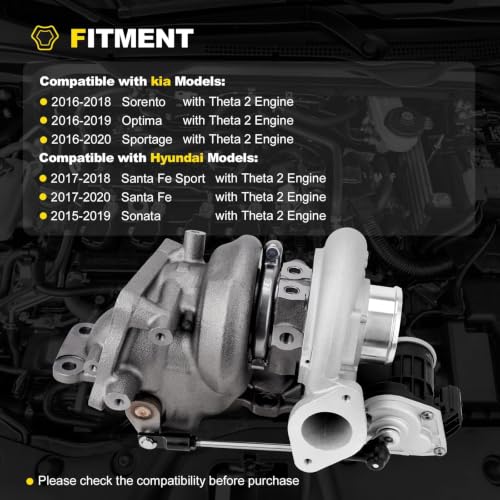
Advertised Vehicle Fitment
Hyundai
- Sonata 2.0T: 2015–2019
- Santa Fe Sport 2.0T: 2017–2018
- Santa Fe 2.0T: 2019–2020
Kia
- Sorento 2.0T: 2015–2018
- Optima 2.0T: 2016–2019
- Sportage SX 2.0T: 2016–2020
Fitment applies only to compatible 2.0L turbocharged engines using OE turbo number 28231-2GTA1 and the matching TD04L6 configuration.
The Sportage was also offered with naturally aspirated engines. Kia confirms the 2019 Sportage SX was the 2.0L turbo model, so trim and engine verification matter. kiamedia.com
Important Santa Fe Fitment Correction
The broader “2017–2020 Santa Fe” description should not be used by itself.
Hyundai used two related model names during this period:
- 2017–2018 Hyundai Santa Fe Sport 2.0T
- 2019–2020 Hyundai Santa Fe 2.0T
The three-row Santa Fe and naturally aspirated models are not automatically compatible. Verify the VIN and original turbo number before ordering.
$265.99
Confirm Fitment Before Purchase
Match all of the following:
- Year, make and model
- 2.0L turbocharged gasoline engine
- Engine family and code
- OE number 28231-2GTA1
- Compressor-housing orientation
- Turbine-housing configuration
- Oil-feed and return fittings
- Coolant connections
- Wastegate actuator type
- Intake, exhaust and charge-pipe flanges
A generic “Hyundai/Kia 2.0L” match is not enough. Hyundai and Kia produced several 2.0L engines during these years, because straightforward parts catalogs apparently lacked sufficient adventure.
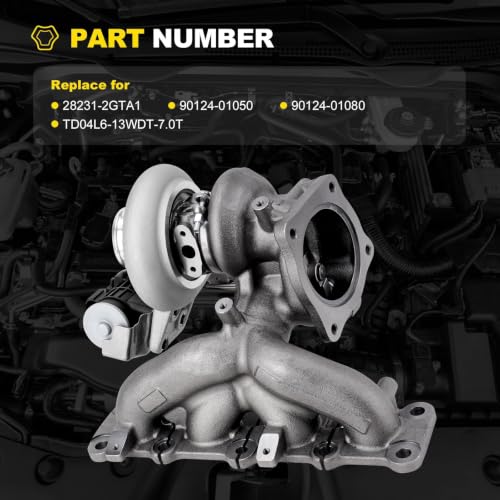
Reference and Interchange Numbers
This turbocharger may replace or interchange with:
- 28231-2GTA1
- 282312GTA1
- 90124-01050
- 9012401050
- 90124-01080
- 9012401080
- TD04L6-13WDT-7.0T
- TD04HL6
Use these numbers alongside the VIN and physical configuration of the original turbocharger.
Product Specifications
| Specification | Details |
|---|---|
| Product type | Complete turbocharger assembly |
| Turbo model | TD04L6-13WDT-7.0T |
| OE reference | 28231-2GTA1 |
| Engine displacement | 2.0L |
| Engine configuration | Turbocharged inline-four |
| Engine family | Theta II |
| Fuel system | Gasoline direct injection |
| Wastegate actuator | Included as part of assembly |
| Metal mounting gaskets | Included |
| Oil-return gasket | Included |
| Replacement type | Direct replacement |
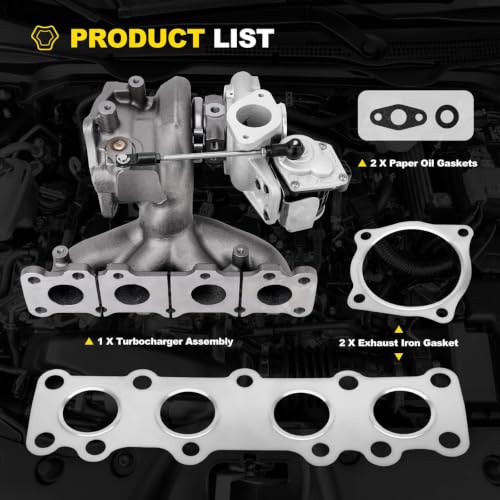
Package Contents
The kit includes:
- Complete turbocharger assembly
- Compressor housing
- Turbine housing
- Center bearing housing
- Internal wastegate and actuator
- Metal mounting gaskets
- Oil-return gasket
Oil-feed lines, coolant lines, mounting studs, nuts, clamps and intake hardware may not be included. Inspect the package before taking the vehicle apart.
Factory-Style Turbo Performance
The replacement turbocharger is designed to restore:
- Factory boost response
- Normal acceleration
- Consistent wastegate operation
- Smooth power delivery
- Original engine drivability
- Proper airflow under load
The supplied claim that the turbo “significantly increases engine power” needs context. On an otherwise stock vehicle, this replacement should restore power lost to a failing turbo—not produce power beyond the factory calibration.
Likewise, replacing a failed turbo may restore normal fuel economy, but the turbo itself does not guarantee reduced fuel consumption. Apparently physics declined the marketing department’s meeting invitation.
Signs the Original Turbo May Be Failing
Replacement may be appropriate if diagnosis confirms:
- Excessive shaft movement
- Compressor or turbine-wheel damage
- Oil entering the intake or exhaust
- Persistent blue exhaust smoke
- Metallic scraping or siren-like noise
- Slow boost response
- Reduced power under acceleration
- Damaged wastegate linkage
- P0299 turbocharger underboost
- P0234 turbocharger overboost
- Cracked or leaking turbo housing
These symptoms can also be caused by charge-pipe leaks, restricted oil lines, damaged intercooler plumbing, control-solenoid faults, exhaust restrictions or internal engine damage.
Before replacing the turbo, review Pro Street’s guide to checking engine health before working with boost.
Integrated Internal Wastegate
The internal wastegate controls turbo speed and boost pressure by diverting exhaust around the turbine wheel when commanded.
A wastegate or actuator problem may cause:
- Low boost
- Delayed turbo response
- Inconsistent acceleration
- Boost surging
- Overboost
- Underboost
- Reduced-power mode
- Stored boost-control codes
Do not alter actuator-rod length or preload without proper boost measurement and ECU calibration.
Gaskets Included
The included metal and oil-return gaskets help seal the turbocharger’s mounting and lubrication connections.
Before assembly:
- Remove all old gasket material
- Inspect the mating surfaces for damage
- Verify the oil-return path is unrestricted
- Keep sealant away from oil passages
- Tighten fasteners in the specified sequence
- Use the vehicle manufacturer’s torque values
Excess sealant near the oil system can break loose and block lubrication to the turbo. That is an impressively quick way to turn new parts into warranty paperwork.
Critical Turbo Installation Requirements
Never start the engine with a dry replacement turbocharger.
Before installation:
- Determine why the original turbo failed.
- Check the intake for compressor debris.
- Clean contaminated charge pipes and the intercooler.
- Inspect the exhaust for turbine debris or restrictions.
- Replace the engine oil and filter.
- Inspect or replace the turbo oil-feed line.
- Confirm the oil-return line is clear.
- Inspect coolant hoses and fittings.
- Verify that both wheels rotate freely.
- Prime the turbo with clean engine oil.
- Crank the engine without starting until oil pressure develops.
- Start the engine and inspect every connection for leaks.
Garrett recommends fresh oil and filters, a clean intake system and inspection of the crankcase-breather system during turbocharger replacement. www.garrettmotion.com
Diagnose the Original Failure First
Common causes of premature turbo damage include:
- Restricted oil supply
- Dirty or incorrect engine oil
- Blocked oil-return passages
- Low oil pressure
- Excessive crankcase pressure
- Foreign-object damage
- Intake-system leaks
- Engine overheating
- Incorrect boost control
- Restricted catalytic converter
- Internal engine wear
Installing a new turbo without correcting the underlying problem can damage the replacement quickly.
Professional Installation Recommended
Turbocharger replacement involves exhaust fasteners, oil and coolant connections, intake plumbing and boost-control hardware. Professional installation is strongly recommended.
After installation:
- Check for oil and coolant leaks
- Verify proper oil pressure
- Confirm wastegate movement
- Monitor commanded and actual boost
- Scan for pending fault codes
- Recheck fluid levels after the first heat cycle
Specification: 28231-2GTA1 TD04L6 Turbocharger Kit for Hyundai and Kia 2.0T
|
User Reviews
Be the first to review “28231-2GTA1 TD04L6 Turbocharger Kit for Hyundai and Kia 2.0T”
You must be logged in to post a review.





There are no reviews yet.