
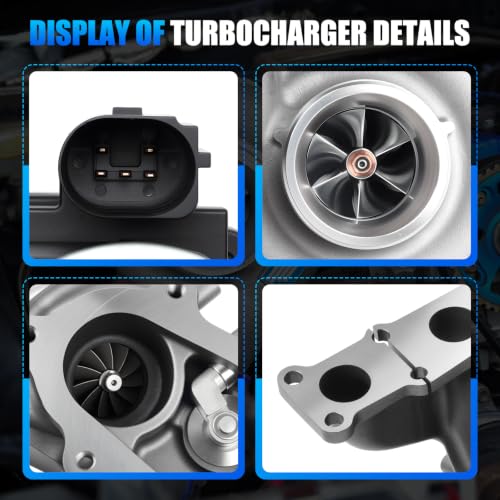
TD04HL4S Turbocharger Kit for Hyundai Sonata, Santa Fe Sport, Kia Optima and Sportage 2.0T
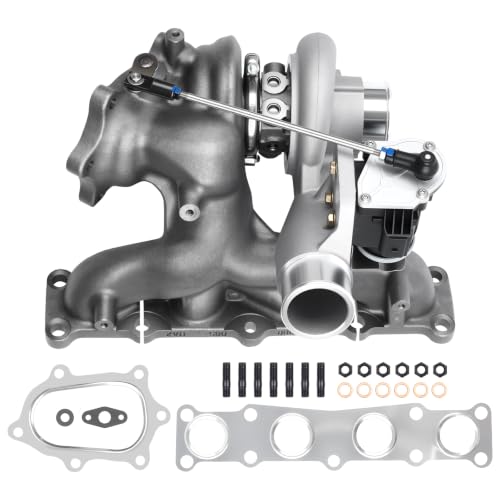
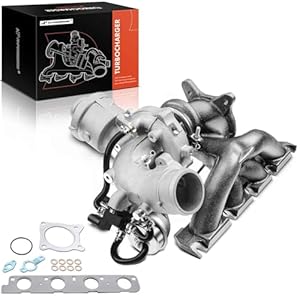
Restore factory-style boost response with this complete TD04HL4S turbocharger kit for select Hyundai and Kia vehicles equipped with the Theta II 2.0L turbocharged gasoline engine. The assembly includes an internal wastegate actuator and installation gaskets, providing the primary components needed to replace a worn or failed original turbocharger.
This is a direct-replacement turbocharger designed to restore normal boost delivery and drivability. It is not an oversized performance upgrade and should not require a custom exhaust manifold or aftermarket tune when installed in the correct factory application.
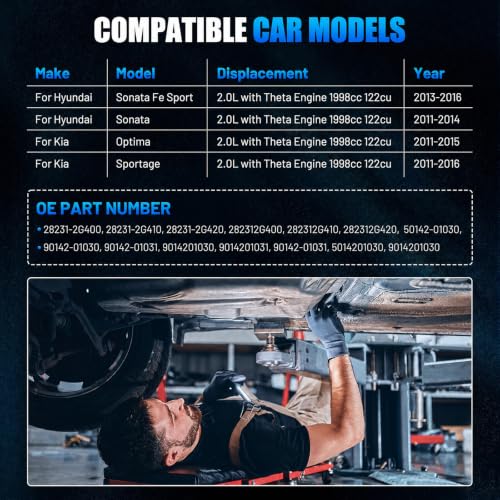
Vehicle Fitment
Hyundai
- Santa Fe Sport 2.0T: 2013–2016
- Sonata 2.0T: 2011–2014
Kia
- Optima 2.0T: 2011–2015
- Sportage SX 2.0T: 2011–2016
The original listing incorrectly says “Hyundai Sonata Fe Sport.” The correct model is Hyundai Santa Fe Sport. There was no Sonata Fe Sport, despite that name sounding exactly like something produced during a particularly long marketing meeting.
Engine and Turbo Requirements
This turbocharger is intended for compatible vehicles with:
- Theta or Theta II engine family
- 2.0L displacement
- Turbocharged gasoline direct injection
- 1,998cc inline-four configuration
- Matching TD04HL4S turbo arrangement
- Compatible internal wastegate actuator
- Matching oil, coolant, intake and exhaust connections
The Kia Sportage was also available with a naturally aspirated 2.4L engine. Kia identifies the 2016 Sportage SX as the trim equipped with the turbocharged 2.0L GDI engine.
$282.99
Confirm Fitment Before Ordering
Verify all of the following:
- Exact year, make and model
- 2.0L turbocharged engine
- Engine code and VIN
- Original turbocharger identification
- Compressor and turbine housing orientation
- Oil-feed and oil-return fittings
- Coolant-line configuration
- Wastegate actuator position
- Exhaust and charge-pipe flanges
Do not order by displacement alone. Several of these vehicles were offered with naturally aspirated engines that use no turbocharger whatsoever, which tends to create a rather obvious installation problem.
Reference and Interchange Numbers
This turbocharger may replace or interchange with:
- 28231-2G400
- 28231-2G410
- 28231-2G420
- 282312G400
- 282312G410
- 282312G420
- 50142-01030
- 5014201030
- 90142-01030
- 90142-01031
- 9014201030
- 9014201031
Use the OE number together with the VIN and physical turbo configuration. Matching one number is useful; matching the entire assembly is considerably more reassuring.
Product Specifications
| Specification | Details |
|---|---|
| Product type | Complete turbocharger assembly |
| Turbo model | TD04HL4S-04H-9T-8.5 |
| Engine family | Theta/Theta II |
| Displacement | 2.0L |
| Engine configuration | Turbocharged inline-four |
| Fuel system | Gasoline direct injection |
| Engine displacement | 1,998cc |
| Construction | High-temperature alloy |
| Wastegate actuator | Included |
| Installation gaskets | Included |
| Replacement style | Direct replacement |
Complete Turbocharger Assembly
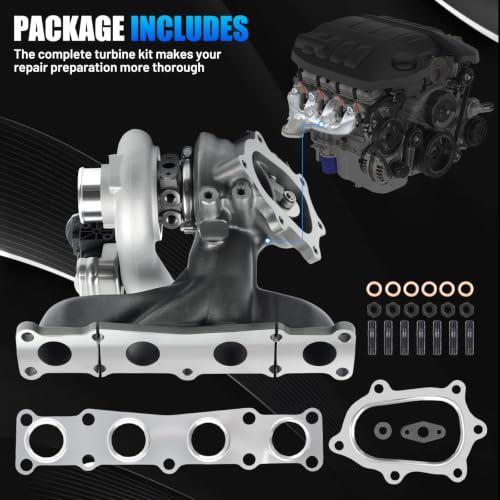
The kit includes:
- TD04HL4S turbocharger assembly
- Internal wastegate actuator
- Wastegate linkage
- Installation gaskets or seals
- Preassembled compressor housing
- Preassembled turbine housing
Oil lines, coolant lines, studs, nuts, clamps and intake hardware may not be included. Inspect the complete package before disassembling the vehicle.
Direct-Replacement Turbo Performance
This turbocharger is designed to restore:
- Factory-style boost pressure
- Normal throttle response
- Proper wastegate operation
- Smooth power delivery
- Original engine drivability
- Reliable daily operation
It should not be advertised as a high-flow racing turbo or guaranteed horsepower upgrade. If the goal is more boost, the engine will also need appropriate fuel delivery, cooling, exhaust modifications and ECU calibration. Boost is not a volume knob you turn until the connecting rods complain.
Integrated Wastegate Actuator
The included actuator operates the internal wastegate. When boost reaches the commanded level, the wastegate directs part of the exhaust flow around the turbine wheel to control turbo speed and manifold pressure.
Wastegate or actuator problems may cause:
- Slow boost response
- Low or inconsistent boost
- Overboost
- Underboost
- Surging during acceleration
- Reduced engine power
- Limp-mode operation
- P0299 underboost codes
- P0234 overboost codes
Do not modify actuator-rod length or preload unless the vehicle is being calibrated by a qualified tuner.
Signs of a Failing Turbocharger
Replacement may be needed when proper diagnosis confirms:
- Excessive turbo shaft movement
- Damaged compressor or turbine blades
- Oil entering the intake or exhaust
- Blue exhaust smoke
- Metallic scraping or siren-like noises
- Slow or inconsistent boost response
- Reduced power under acceleration
- Damaged wastegate linkage
- Cracked turbocharger housing
- Persistent P0299 or P0234 codes
These symptoms can also come from boost leaks, restricted oil lines, damaged intercooler plumbing, faulty control solenoids, exhaust restrictions or internal engine problems.
Before replacement, review Pro Street’s guide to checking engine health before working with boost.
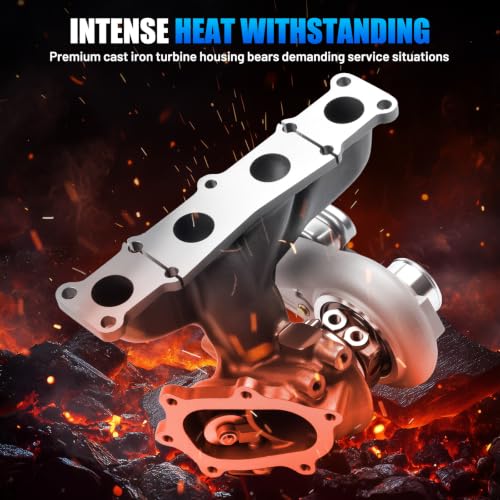
High-Temperature Alloy Construction
The compressor, turbine and center-housing components are constructed to operate under the heat and pressure produced by a turbocharged direct-injection engine.
Durability still depends heavily on:
- Clean engine oil
- Correct oil pressure
- An unrestricted oil drain
- Proper coolant circulation
- A clean intake system
- Correct boost control
- Proper warm-up and shutdown habits
Even an excellent turbocharger cannot survive long without lubrication. Metal spinning at six-figure rpm tends to be annoyingly particular about oil.
Critical Installation Instructions
A replacement turbocharger must be primed before the engine is started.
Before installation:
- Determine why the original turbocharger failed.
- Inspect the intake tract for compressor-wheel debris.
- Clean the intercooler and charge pipes if contaminated.
- Inspect the exhaust system for turbine debris or restrictions.
- Replace the engine oil and oil filter.
- Inspect or replace the turbo oil-feed line.
- Confirm the oil-return line is unrestricted.
- Inspect all coolant hoses and fittings.
- Confirm the new wheels rotate freely without housing contact.
- Add clean engine oil to the turbo’s oil inlet.
- Crank the engine without starting until oil pressure develops.
- Start the engine and inspect for oil, coolant, exhaust and boost leaks.
Garrett’s installation guidance recommends fresh oil and filters, a clean intake system and inspection of the engine-breather system when replacing a turbocharger. www.garrettmotion.com
Diagnose the Original Failure
Common causes of turbocharger damage include:
- Restricted oil supply
- Contaminated oil
- Blocked oil-return line
- Low engine-oil pressure
- Excessive crankcase pressure
- Foreign-object damage
- Intake leaks
- Engine overheating
- Incorrect wastegate control
- Exhaust restrictions
- Internal engine wear
Installing a new turbo without correcting the original cause can quickly damage the replacement and may invalidate warranty coverage.
Gaskets Included
The included gaskets help seal critical mounting and fluid connections. All mating surfaces must be clean, flat and free of old gasket material.
Avoid excessive sealant near oil passages. A loose ribbon of silicone inside the oil-feed system can transform a new turbocharger into a very expensive desk ornament.
Professional Installation Recommended
Turbocharger replacement requires access to hot-side exhaust fasteners, oil and coolant connections, intake plumbing and boost-control hardware. Professional installation is recommended.
After installation:
- Check for leaks at idle
- Allow the engine to reach operating temperature
- Verify oil pressure
- Confirm wastegate movement
- Monitor boost pressure
- Scan for stored or pending codes
- Recheck fluid levels after the first heat cycle
Specification: TD04HL4S Turbocharger Kit for Hyundai Sonata, Santa Fe Sport, Kia Optima and Sportage 2.0T
|
User Reviews
Be the first to review “TD04HL4S Turbocharger Kit for Hyundai Sonata, Santa Fe Sport, Kia Optima and Sportage 2.0T”
You must be logged in to post a review.





There are no reviews yet.