
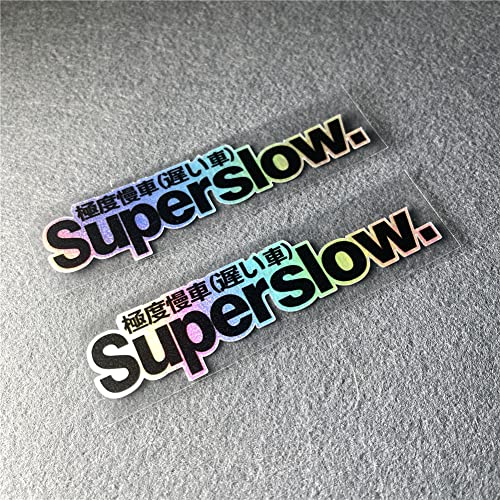
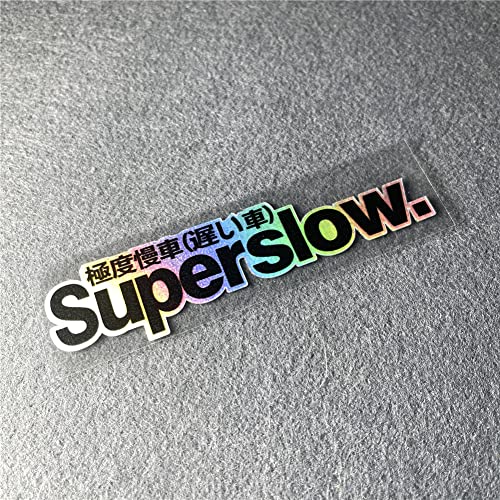
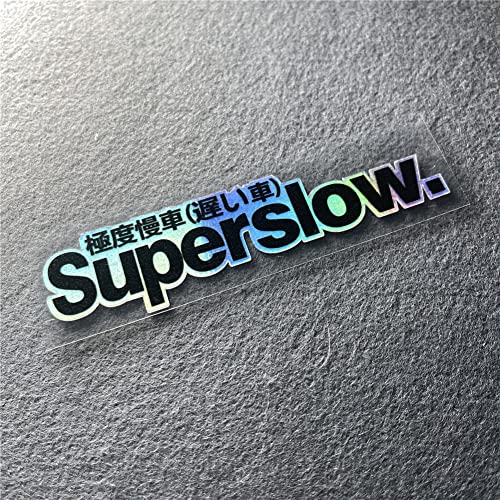
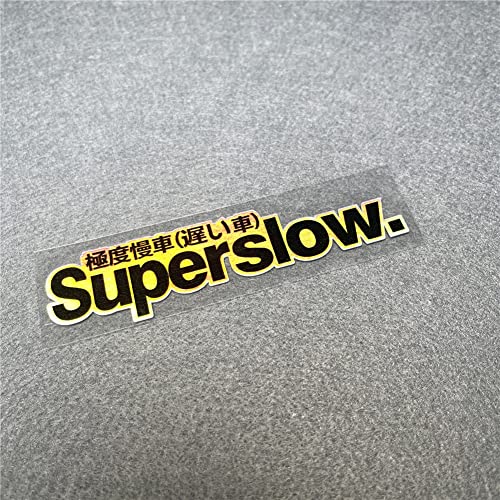
Two Medium-Size Reflective Decals
The package contains two matching stickers. Each measures approximately:
- Width: 10 cm or 3.94 inches
- Height: 2.5 cm or 0.98 inch
The compact size allows the design to fit on smaller panels without dominating the vehicle.
Possible uses for the second decal include:
- Opposite side of the vehicle
- Motorcycle bodywork
- Laptop case
- Toolbox
- Guitar case
- Garage cabinet
- Water bottle
- Gift for another enthusiast
Check the listing photographs to confirm whether both stickers use exactly the same orientation and design.
Laser-Style Reflective Finish
The seller describes this version as “Laser” and reflective. That usually refers to a metallic, holographic or light-reactive surface rather than an active light source.
Appearance can change based on:
- Viewing angle
- Direct sunlight
- Camera flash
- Headlight exposure
- Surface color
- Indoor lighting
- Panel curvature
The stickers do not contain LEDs, wiring or batteries.
No DOT, SAE or other safety-reflector certification has been supplied. Do not use them as replacements for factory reflectors, warning triangles, conspicuity tape or required lighting.
Reflective-looking is an appearance. Certified reflective equipment has paperwork and a considerably less amusing snail.
Waterproof and Sun-Resistant Claims
The decals are marketed as:
- Waterproof
- Sun-resistant
- Fade-resistant
- Long-lasting
- Suitable for outdoor use
Actual service life will depend on:
- Surface preparation
- UV exposure
- Weather
- Temperature cycling
- Car-wash chemicals
- Pressure washing
- Road salt
- Installation quality
- Panel movement
- Fuel or solvent exposure
No specific outdoor lifespan or testing standard is provided, so avoid promising a fixed number of years.
Suitable Installation Locations
The stickers should adhere best to smooth, clean and dry surfaces.
Possible automotive locations include:
- Side windows
- Rear windows
- Fuel-door exterior
- Body panels
- Toolboxes
- Smooth bumper areas
- Motorcycle fairings
- Helmet cases
- Trailer panels
- Removable show-car panels
They may also be used on:
- Laptop cases
- Computer towers
- Guitar bodies or cases
- Skateboards
- Storage cabinets
- Mirrors
- Hard phone cases
- Display boards
Always test surface compatibility when applying a decal to a valuable finish.
Fuel-Door Installation
The exterior of a fuel door can provide a visible mounting location, provided the sticker fits without crossing panel gaps.
When installing near the fuel system:
- Keep the fuel door closed during installation
- Work with the engine switched off
- Keep the decal outside the filler compartment
- Do not cover fuel-type labels
- Do not cover warning labels
- Keep it away from the filler neck
- Do not apply it to the fuel cap
- Avoid contact with gasoline or diesel
- Do not use heat near fuel vapors
The sticker is decoration—not a fuel-system component.
Automotive Areas to Avoid
Do not install the decals over:
- Headlights
- Taillights
- Factory reflectors
- License plates
- Backup cameras
- Parking sensors
- Radar modules
- Airbag covers
- Door-latch areas
- VIN labels
- Tire-information labels
- Emissions labels
- Safety warnings
- Windshield sightlines
- Wiper paths
Before applying any decal to automotive glass, verify that it does not obstruct visibility or violate local requirements. Our guide explaining whether common car modifications are legal covers why a cosmetic modification can still create an equipment or visibility problem.
Surfaces That May Not Work
Avoid applying the decals to:
- Textured plastic
- Rubber
- Leather
- Fabric
- Rust
- Peeling paint
- Damaged clear coat
- Waxed panels
- Silicone-treated trim
- Unfinished wood
- Oily surfaces
- Hot exhaust components
- Flexible hoses
- Strong compound curves
A flat vinyl decal cannot make full contact with deep texture or severe curvature.
How to Install the Super Slow Stickers
What You May Need
- Automotive soap
- Microfiber towels
- Surface cleaner appropriate for the material
- Painter’s tape
- Measuring tape
- Plastic decal squeegee or wrapped card
Step 1: Choose the Location
Hold the decal against the proposed area with the backing attached.
Confirm that it fits completely and does not cross:
- Panel seams
- Trim edges
- Body gaps
- Curved corners
- Moving components
Step 2: Clean the Surface
Remove:
- Dirt
- Wax
- Grease
- Silicone
- Fingerprints
- Detailing spray
- Road residue
Use a product approved for the underlying paint, plastic, glass or metal.
Step 3: Dry Completely
Moisture beneath the vinyl can weaken adhesion and create visible bubbles.
Step 4: Mark the Position
Use painter’s tape to create alignment guides around the sticker.
For two decals installed symmetrically, measure both locations before removing either backing.
Step 5: Peel the Backing
Carefully separate the decal from its backing paper. Avoid touching the adhesive more than necessary.
Step 6: Apply One Edge First
Align one edge with the guide and lower the sticker gradually.
Do not stretch the vinyl.
Step 7: Press From the Center Outward
Use a fingertip, microfiber towel or plastic applicator to move air toward the edges.
Apply firm, even pressure without scratching the reflective surface.
Step 8: Inspect the Edges
Make sure every corner lies flat. Dirt and water can work beneath a lifted edge and shorten decal life.
Step 9: Allow the Adhesive to Bond
Avoid washing, heavy rain or high-pressure water until the adhesive has reached its recommended bond strength.
No exact curing period is provided, so follow any instructions included with the package.
Surface preparation principles are similar across adhesive automotive accessories. Our guide to installing car camera mounts explains why contamination, texture and panel curvature commonly cause adhesive failure.
Repositioning the Decal
The product description does not guarantee repeated repositioning.
If the sticker is misaligned:
- Lift it immediately and gently.
- Avoid stretching the vinyl.
- Keep the adhesive clean.
- Reapply with even pressure.
Repeated removal can weaken the adhesive, distort the design or crease the reflective finish.
Cleaning the Stickers
Use mild automotive soap and a soft microfiber towel.
Avoid:
- Abrasive compounds
- Wax buildup around the edges
- Strong solvents
- Fuel
- Brake cleaner
- Razor blades
- Scrubbing brushes
- Pressure-washer spray directed at the edges
When using an automatic car wash, rotating brushes may catch lifted corners.
Removing the Stickers
Warm the decal gently with a hair dryer and peel it back slowly at a low angle.
Do not use an open flame or high heat, particularly near the fuel door.
Remove remaining adhesive using a product approved for the underlying surface. Test it in an inconspicuous location first.
The listing does not guarantee residue-free removal. Results can vary with:
- Installation duration
- Sun exposure
- Paint condition
- Surface coating
- Adhesive age
- Removal temperature
Weak clear coat or repainted panels may lift during removal.
Guitar and Computer Use
The decals may be applied to compatible smooth guitar finishes or computer cases, but test first.
Avoid placing them over:
- Computer cooling vents
- Fans
- Ports
- Screens
- Serial-number labels
- Guitar pickups
- Controls
- Bridges
- Acoustic sound holes
- Delicate vintage finishes
Older nitrocellulose guitar finishes can react differently to adhesives than modern polyurethane coatings. Use a removable case rather than the instrument itself when finish compatibility is uncertain.
A Small Gift for Car Enthusiasts
The two-piece set can make an inexpensive gift for:
- JDM enthusiasts
- Motorcycle riders
- Slow-car owners
- Project-car builders
- Students
- Laptop collectors
- Guitar players
- Garage decorators
- Car-club members
It works particularly well for the friend whose build has coilovers, aero and racing seats but still reaches 60 mph according to a calendar.
Frequently Asked Questions
How many stickers are included?
The package contains two decals.
What size is each sticker?
Each medium sticker measures approximately 10 × 2.5 cm, or 3.94 × 0.98 inches.
What does the design say?
The design features “Super Slow” wording with a snail-inspired Japanese tuner theme.
Are the stickers reflective?
The seller describes the laser-finish version as reflective. No certified safety-reflector rating is provided.
Are they waterproof?
They are marketed as waterproof and suitable for outdoor use. Durability depends on preparation and exposure.
Can they be installed on a car?
Yes, on a compatible clean, smooth surface away from lights, sensors, safety labels and driver sightlines.
Can they be installed on a fuel door?
Yes, on the smooth exterior surface when they do not cross seams or cover warnings. Keep them outside the filler compartment.
Can they replace a factory reflector?
No. They are decorative decals rather than certified safety equipment.
Will they stick to textured plastic?
Probably not securely. The adhesive needs consistent contact with a smooth surface.
Can they be removed without residue?
Residue-free removal is not guaranteed. Warm the sticker and peel slowly, then use a surface-safe adhesive remover if necessary.
Are they officially licensed JDM products?
No licensing information has been provided. Describe them as Japanese- or JDM-inspired decals.
Final Thoughts
The two-piece “Super Slow” snail decal set adds a compact, reflective and deliberately unserious accent to cars, motorcycles, computers, guitars and other smooth surfaces.
Each sticker measures approximately 10 × 2.5 cm, making the set easy to place without overwhelming the surrounding design. Clean the surface, align the decal carefully and keep it away from lights, sensors, safety labels and fuel-system components.
It may not add horsepower, but at least the sticker is honest about the situation.






There are no reviews yet.